Triggers Attachment
Triggers when you receive a new attachment.
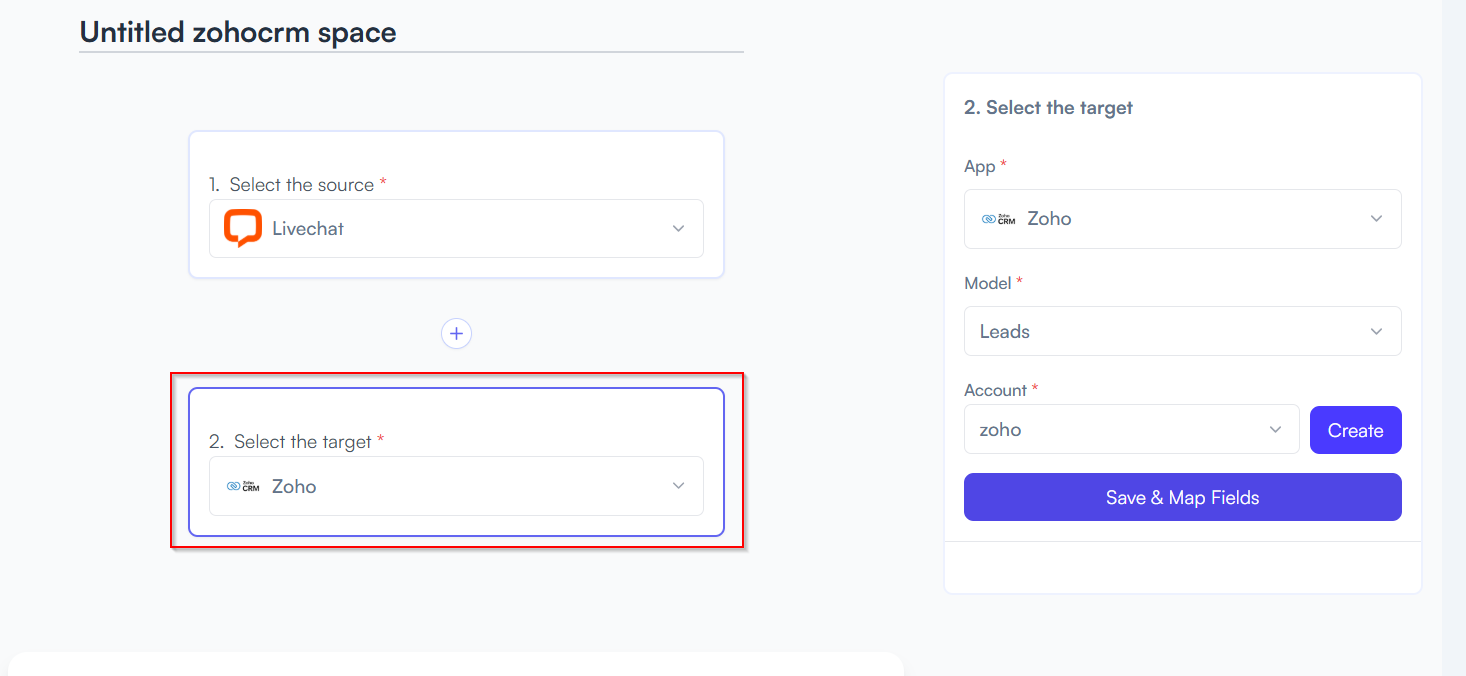
With Syncspace, you can automatically send new entries from your LiveChat directly to your Zoho CRM, no coding or technical skills required. Your chat data flows seamlessly from one platform to the other.
Just follow the steps in this guide, and your LiveChat submissions will start showing up in SendGrid automatically.
It’s fast, simple, and saves you time.
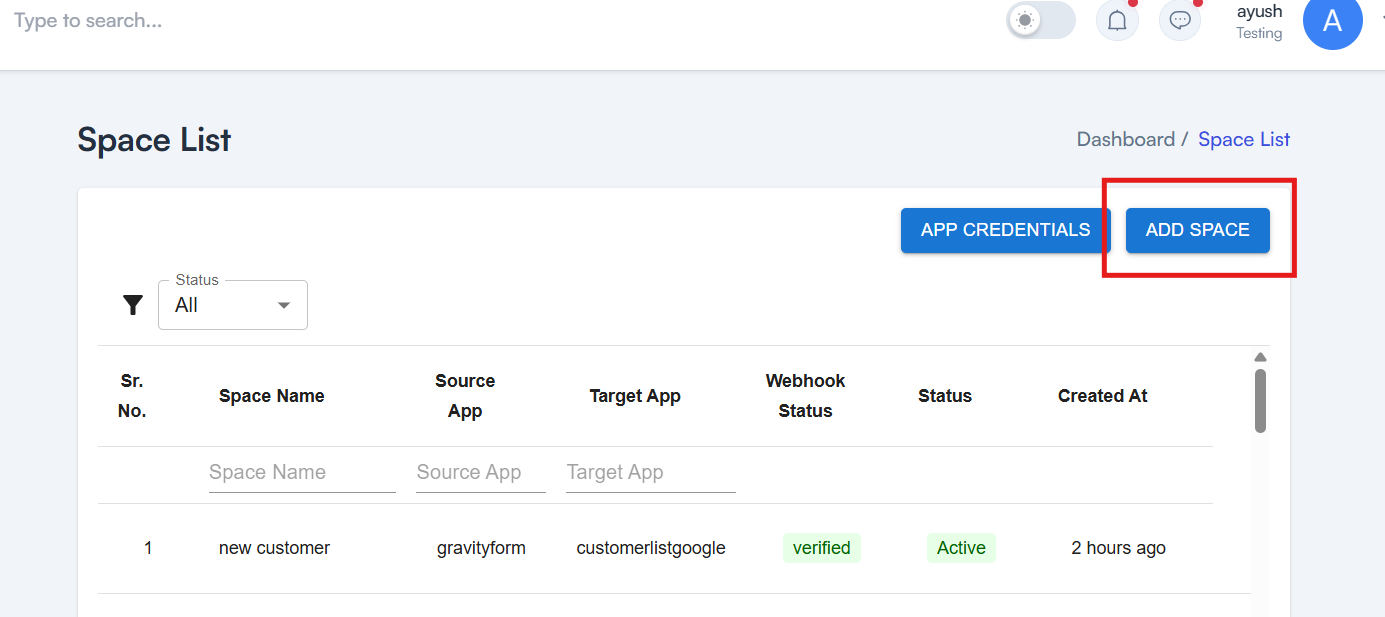
Prerequisites:
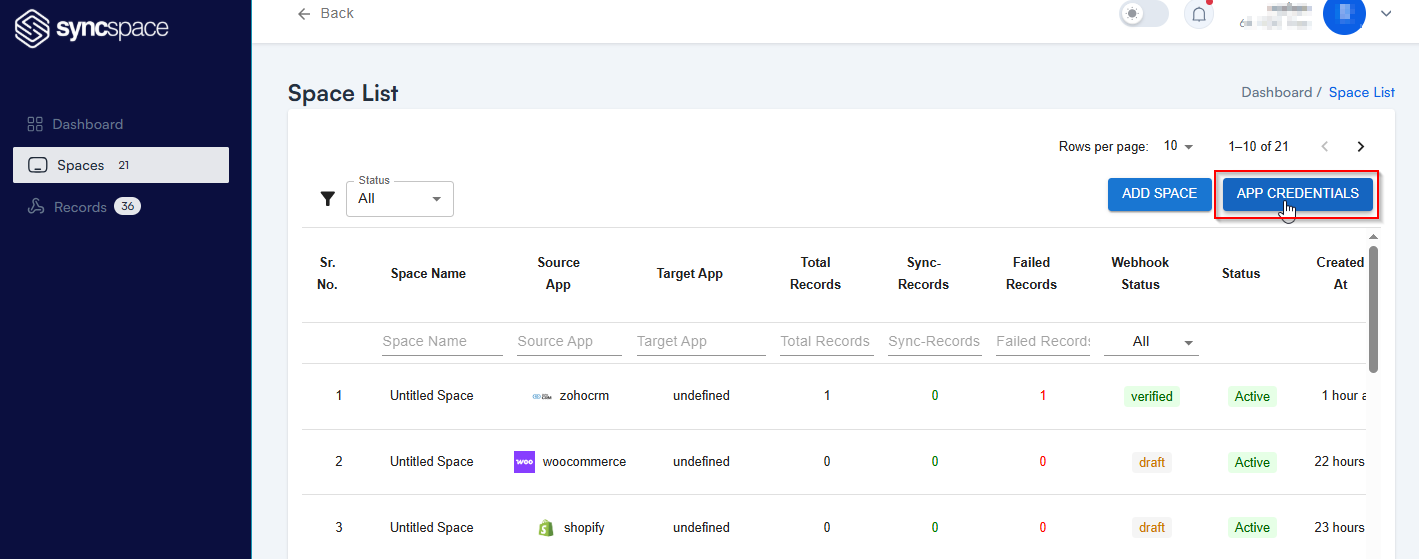
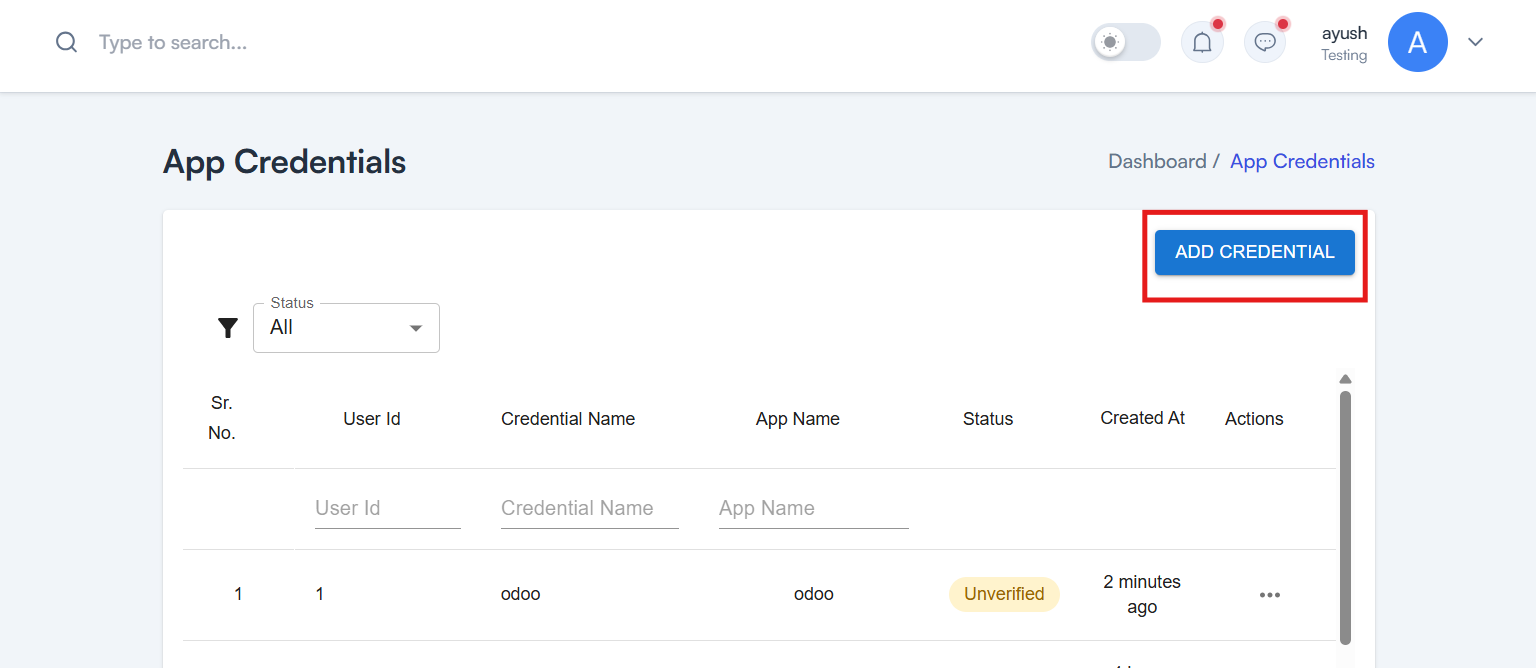
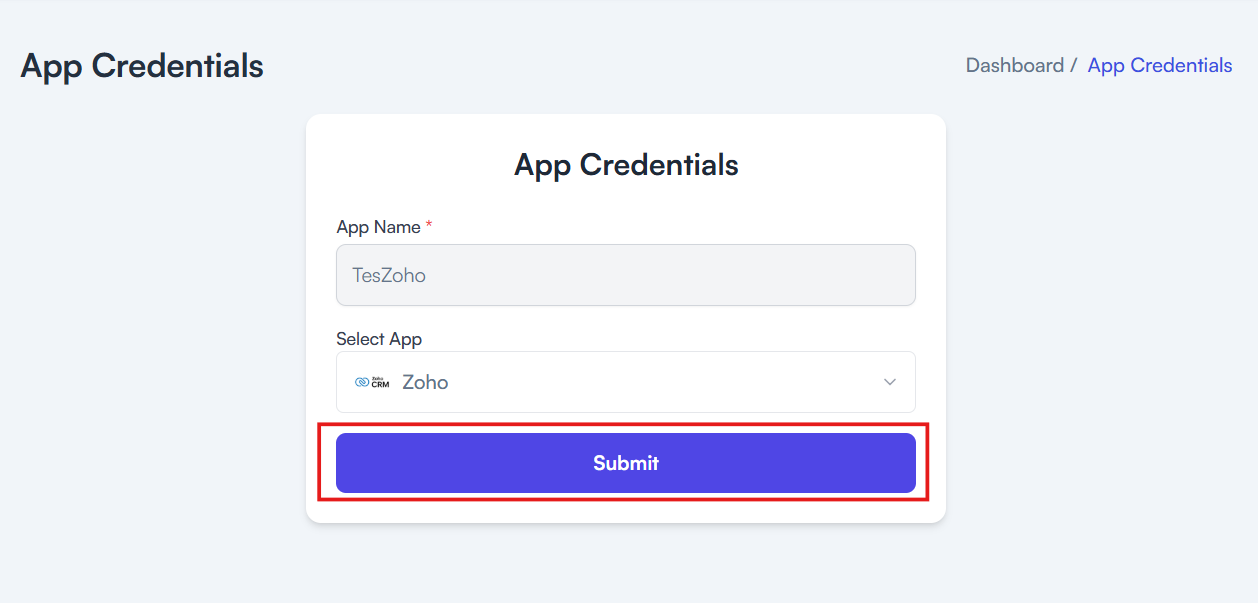
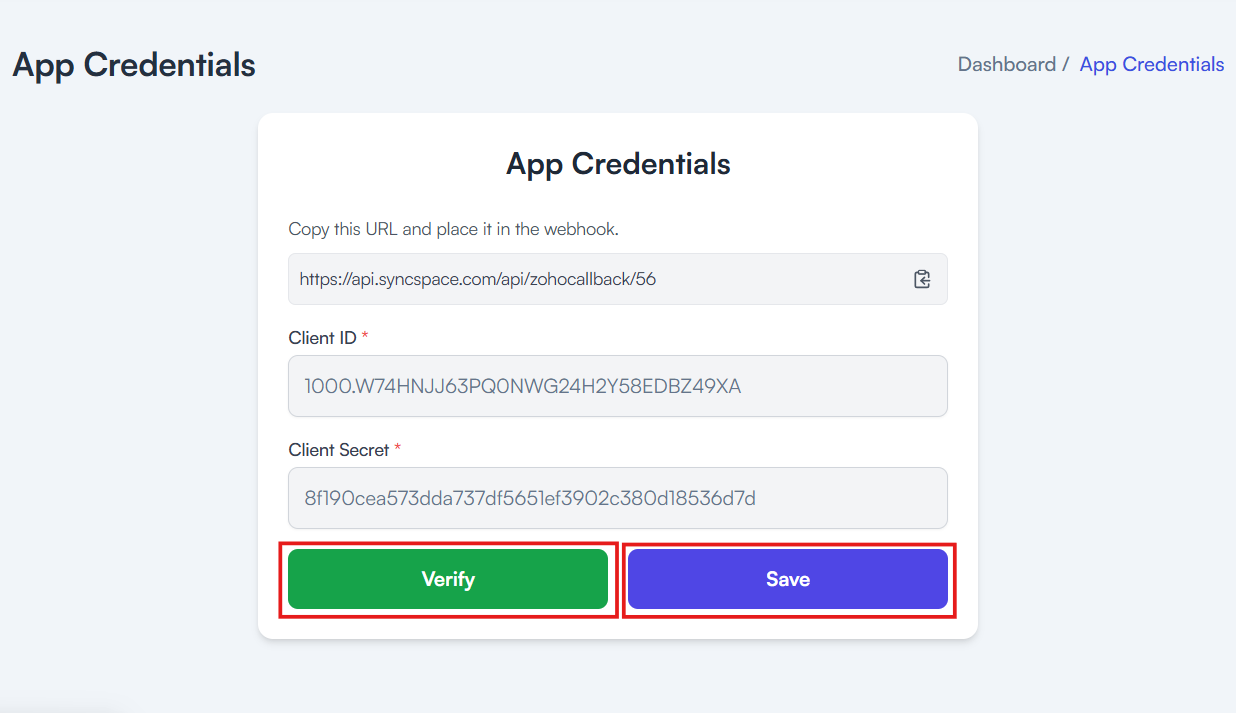
Need help creating credentials? Click here for the guide.
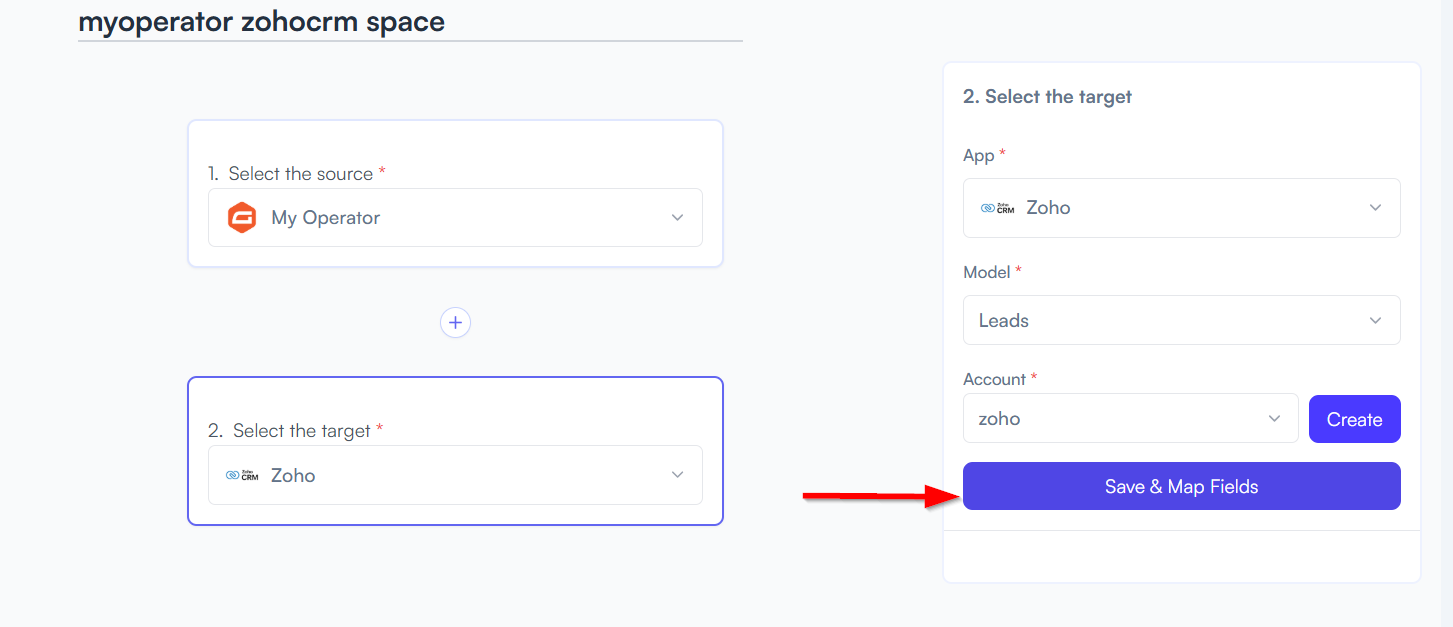
If you’ve already done that, continue below to create the space.
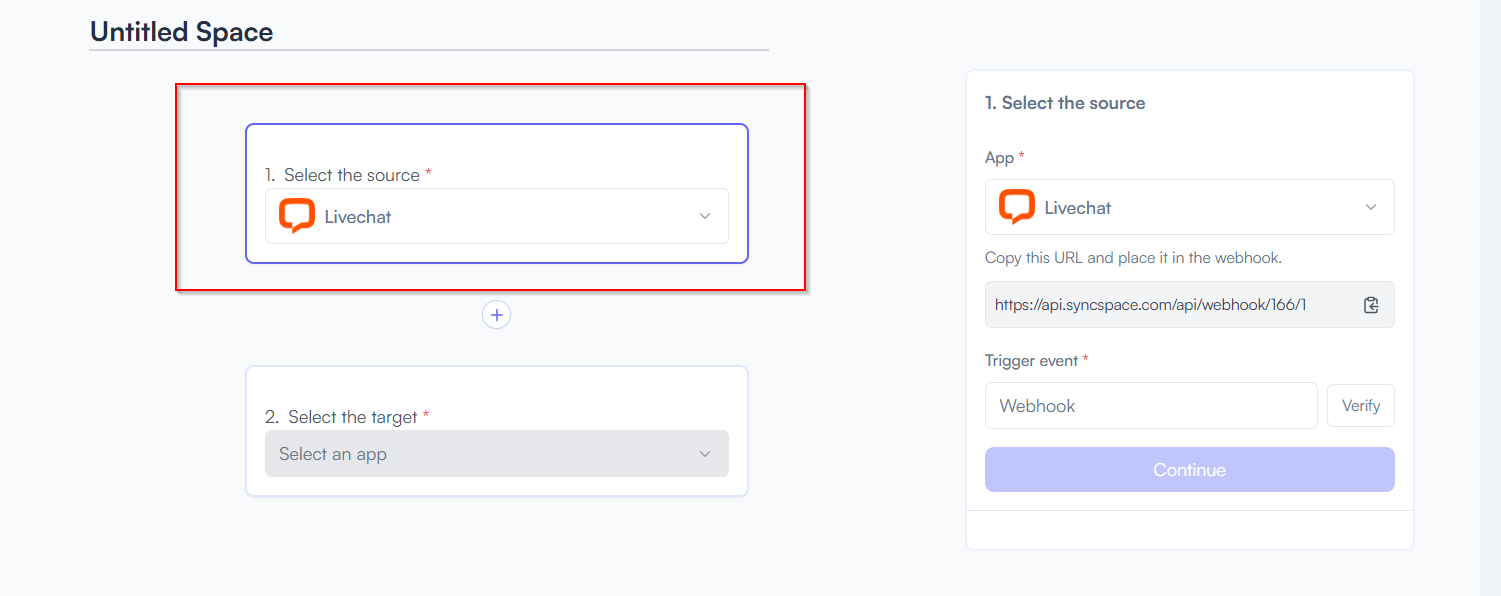
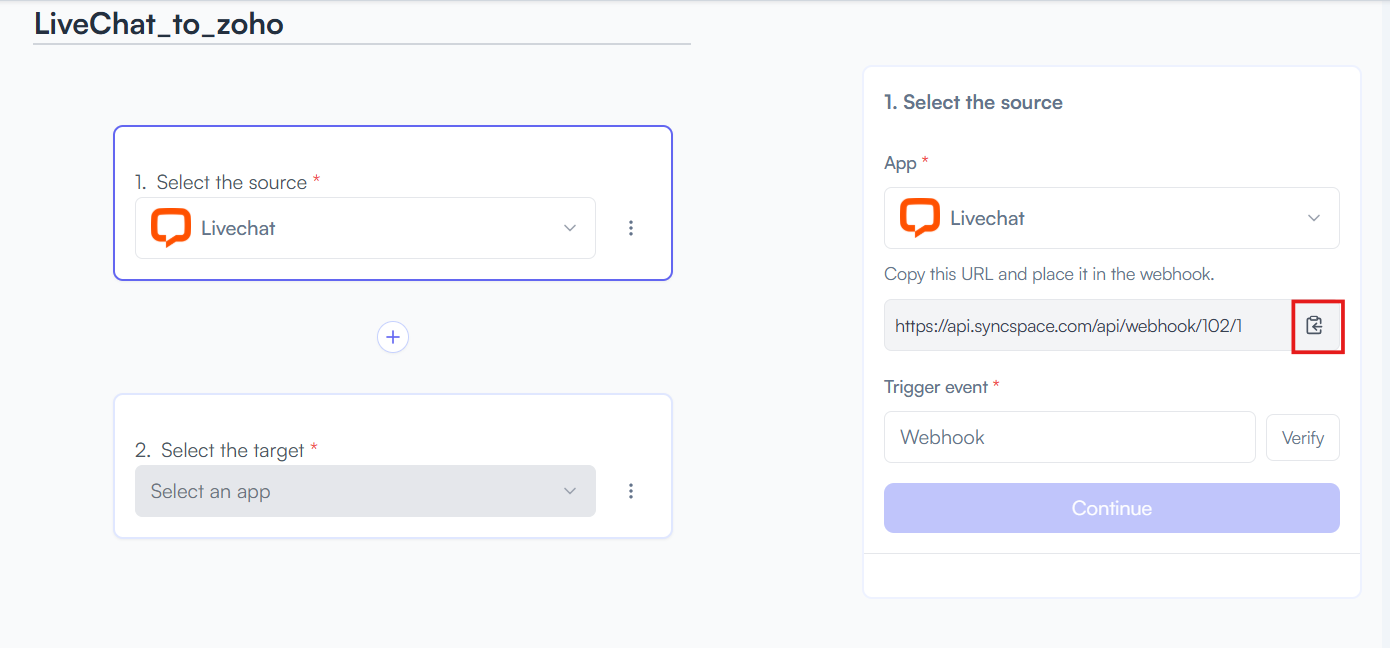
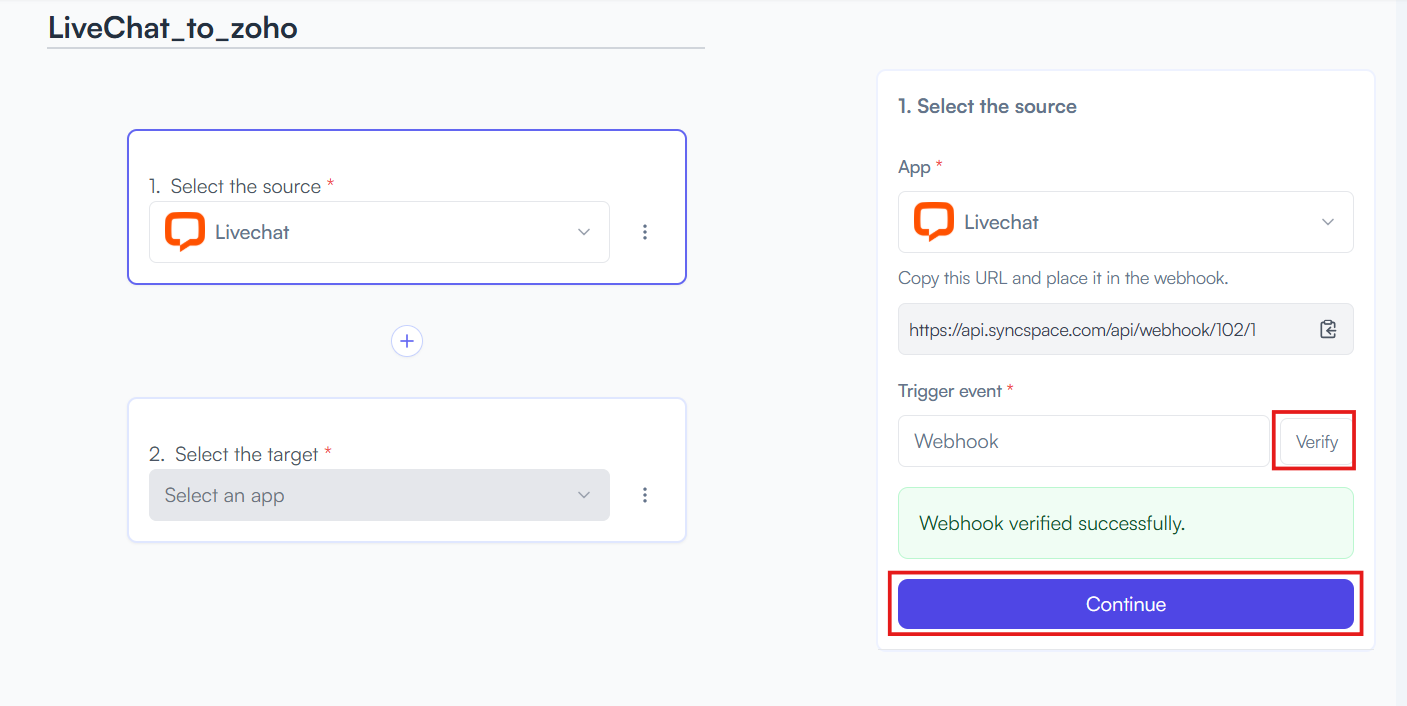
Choose LiveChat
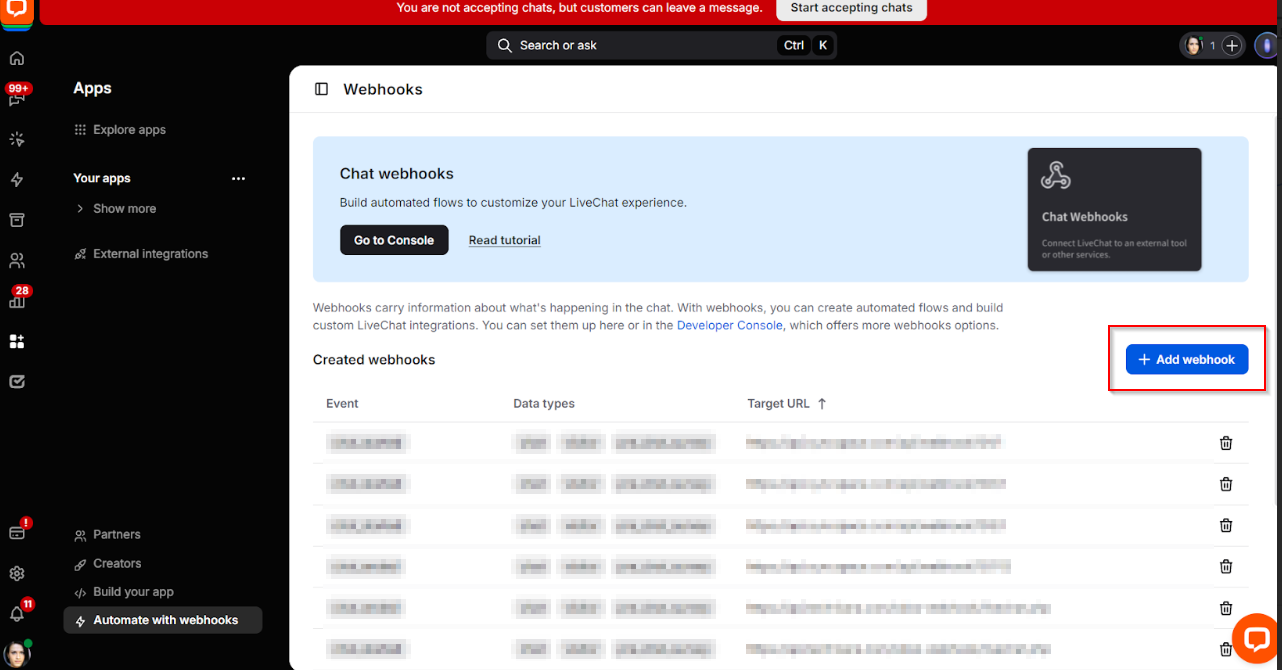
Log in to your LiveChat account and go to the Dashboard.
On the left-side menu, scroll down and click on “Apps”.
At the bottom left under Apps, click on “Automate with Webhooks“

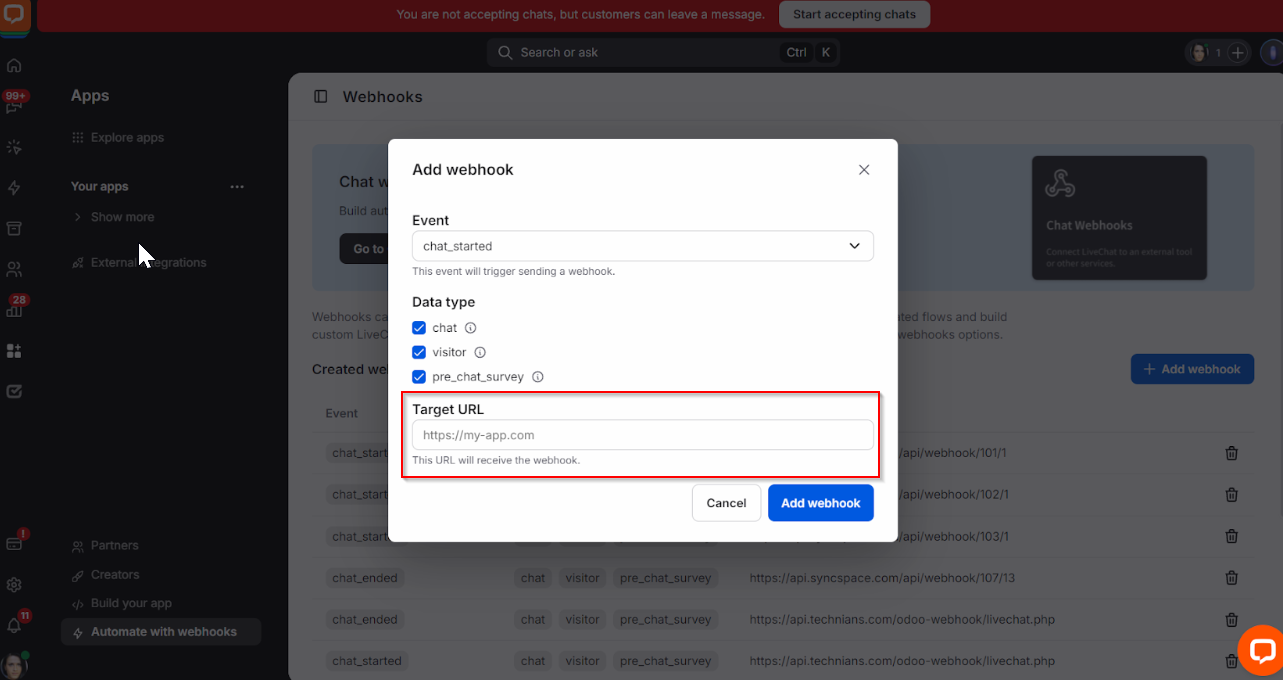
Under the Menu, select Pre-Chat to access the page.
Note: For capturing lead data, it is recommended to enable pre-chat form from the livechat dashboard as shown below
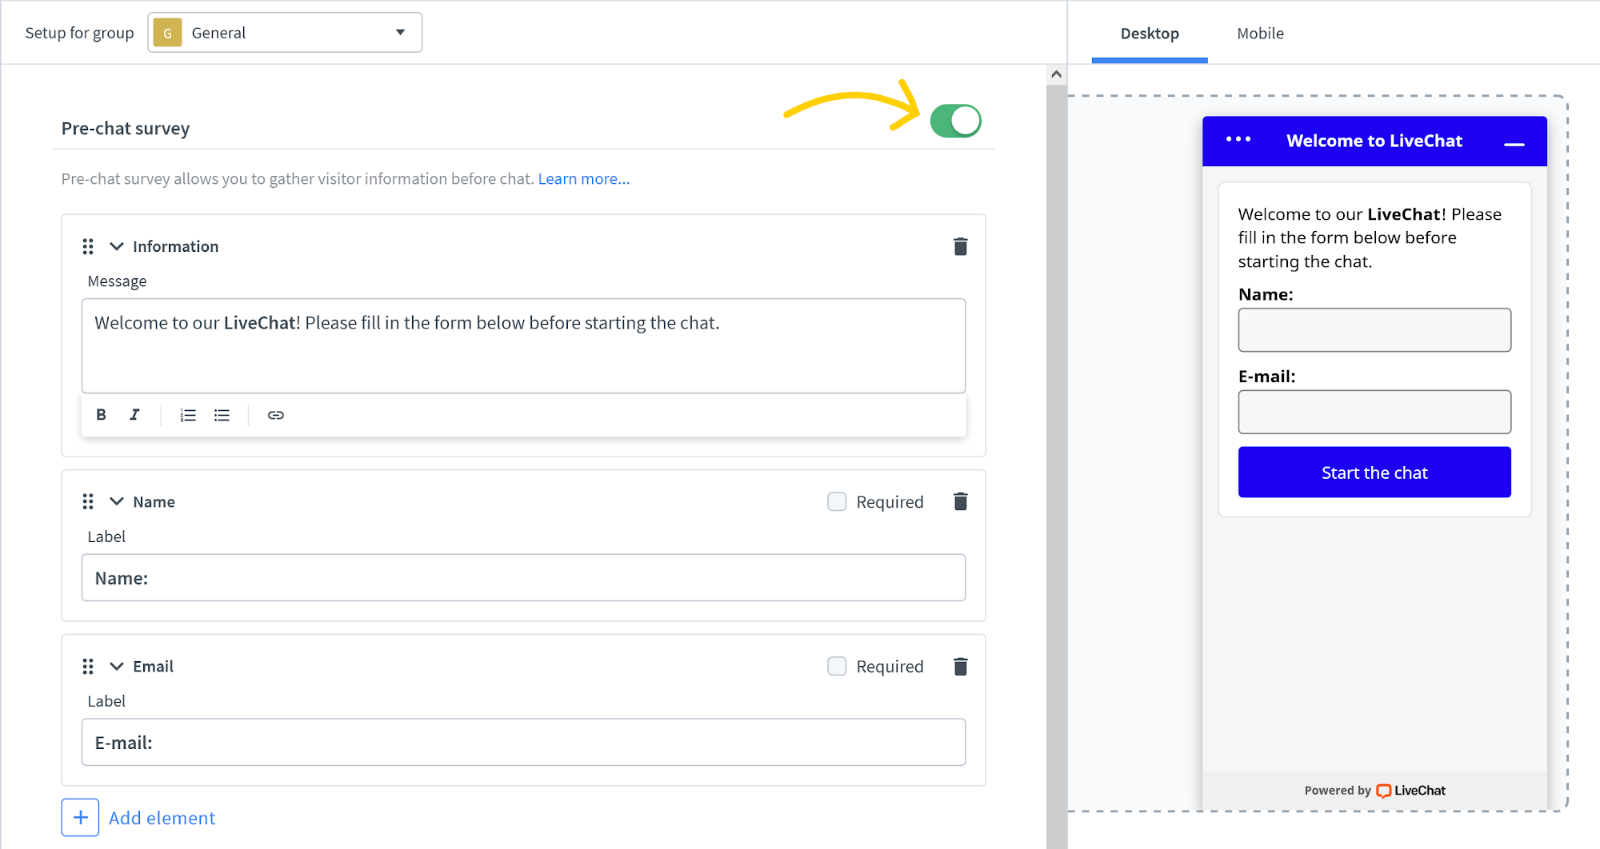
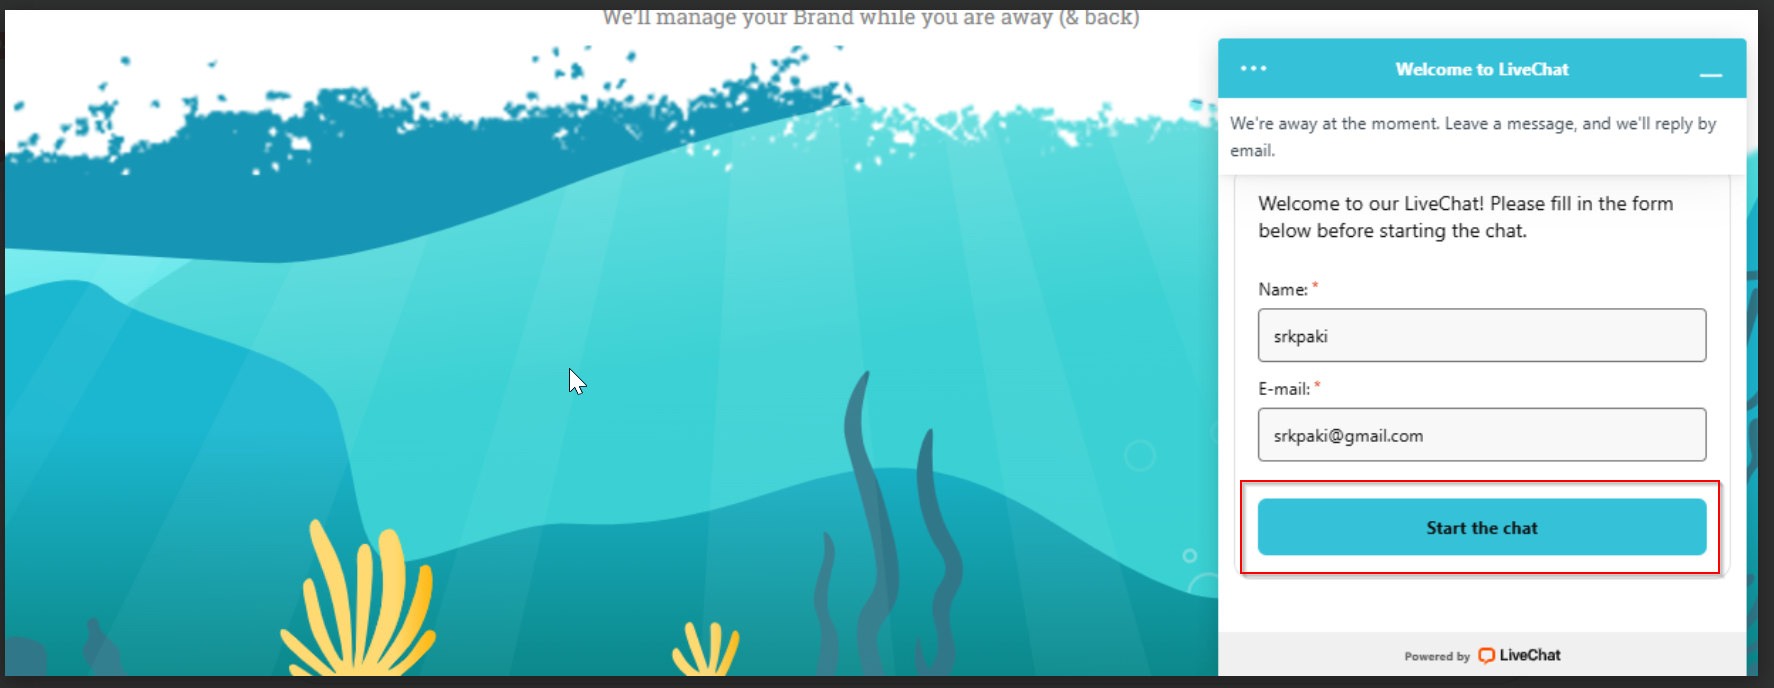
Enter the visitor’s name and email.
Example: Name → Full Name, Email → Email, Chat Transcript → Description
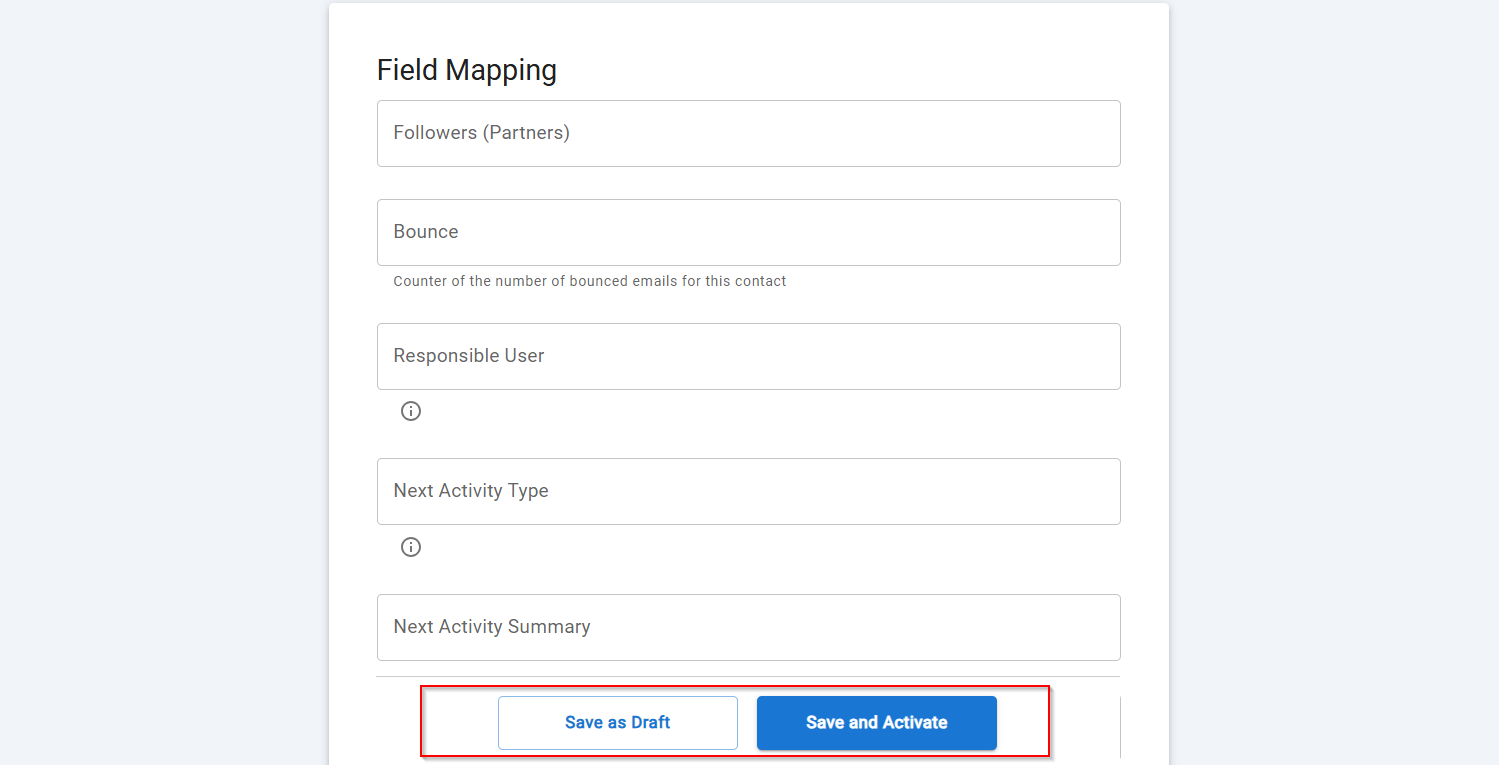
You will see two buttons: Save as Draft and Save and Activate.
Click Save and Activate, your space will be saved and activated automatically.
Click Save as Draft, This will save your space, but it won’t be active. You can activate it later by following the next steps.

You should see the new record created based on the chat submission

Triggers when you receive a new attachment.
Set up rules to specify when this Space can continue running.
Triggers when any new file is added (inside of any folder).


Triggers when you receive a new attachment.
Triggers when you add a new label.
Triggers when you label an email.
Triggers when a new email appears in the specified mailbox.
Triggers when you receive a new attachment.
Triggers when you add a new label.
Triggers when you label an email.
Triggers when a new email appears in the specified mailbox.
Triggers when you receive a new attachment.
Triggers when you add a new label.
Triggers when you label an email.
Triggers when a new email appears in the specified mailbox.