Steps to Verify a Webhook in Zoho Source
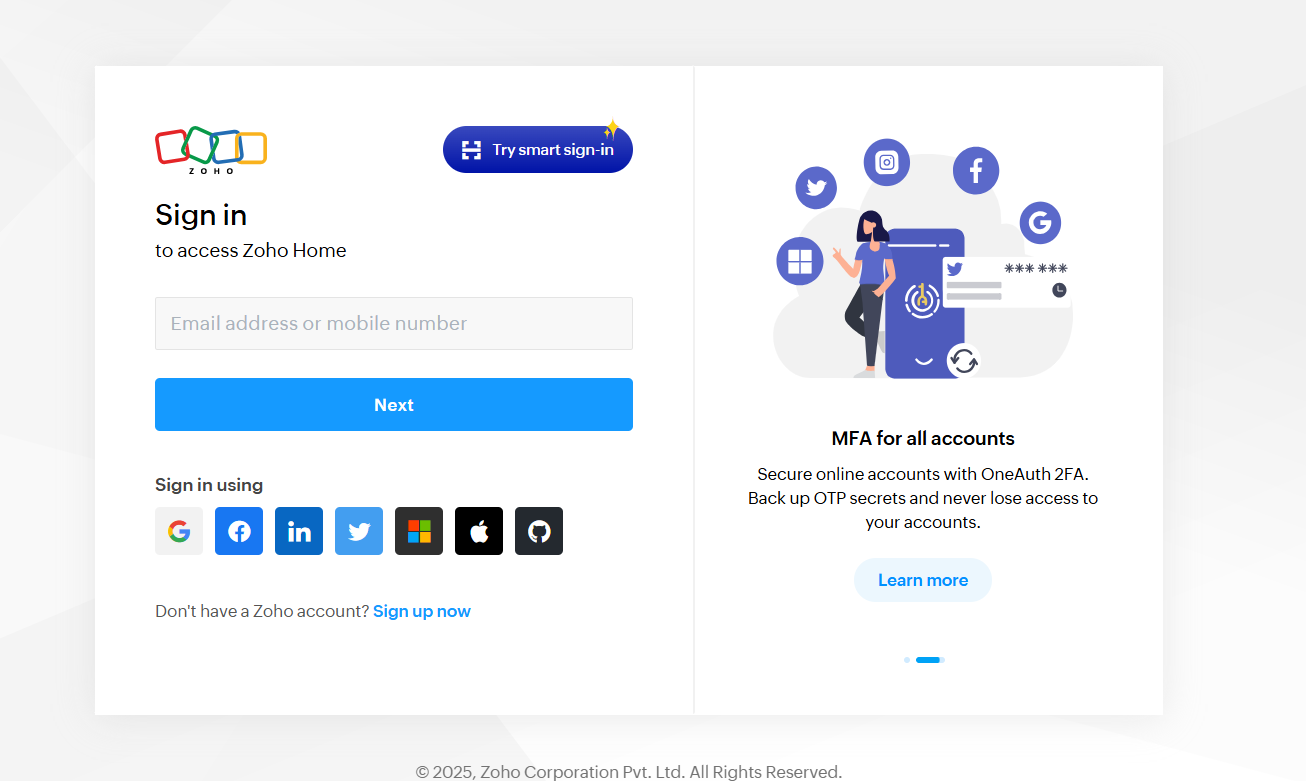
Step 1 Log in to your Zoho CRM dashboard.
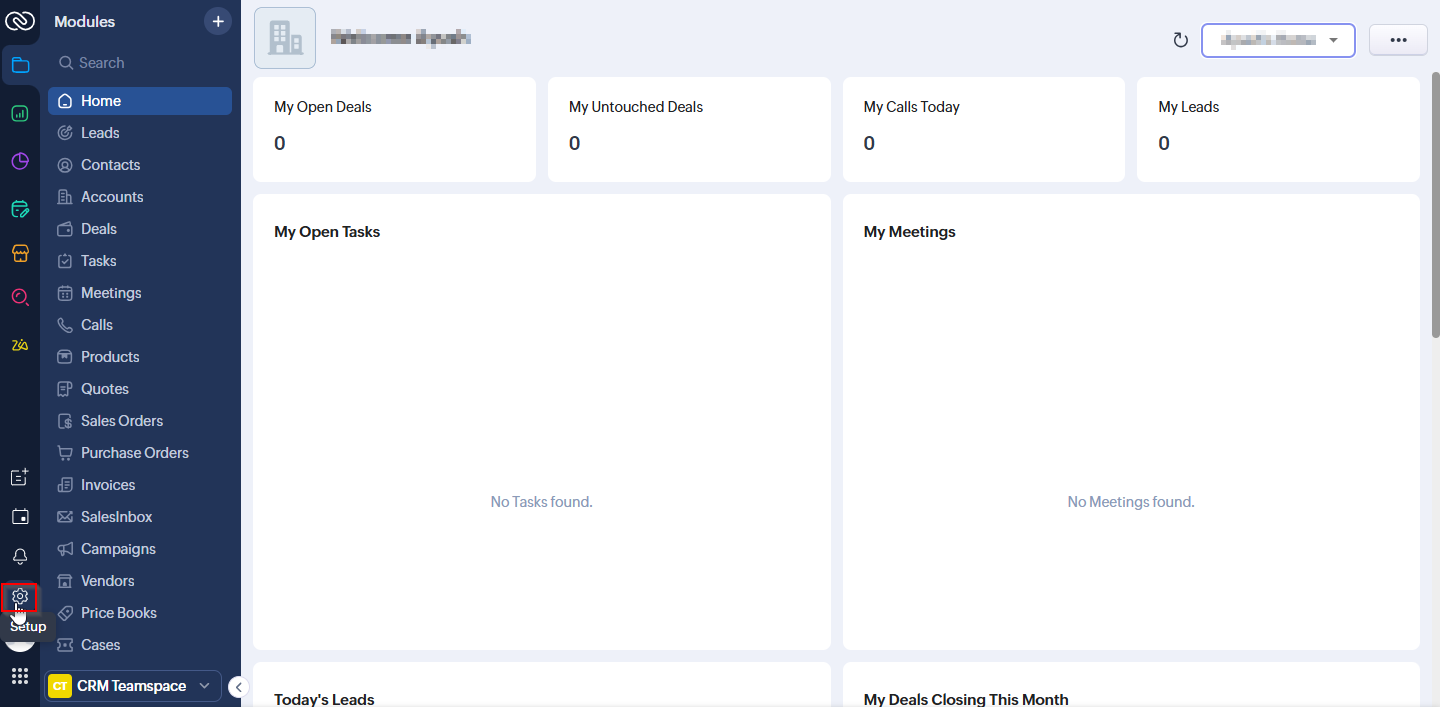
Step 2 In the dashboard, click the Settings icon located in the rightmost sidebar.
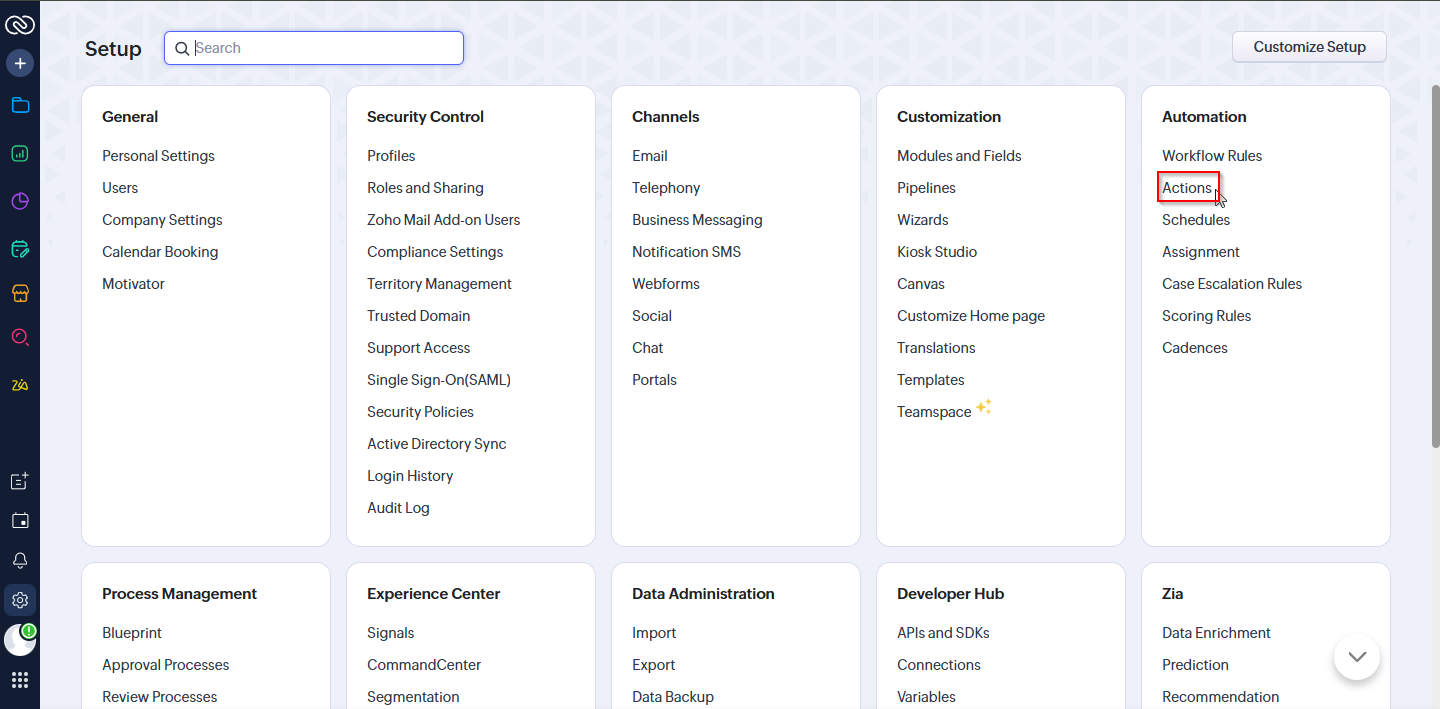
Step 3 Under Settings, go to Action and click on it.
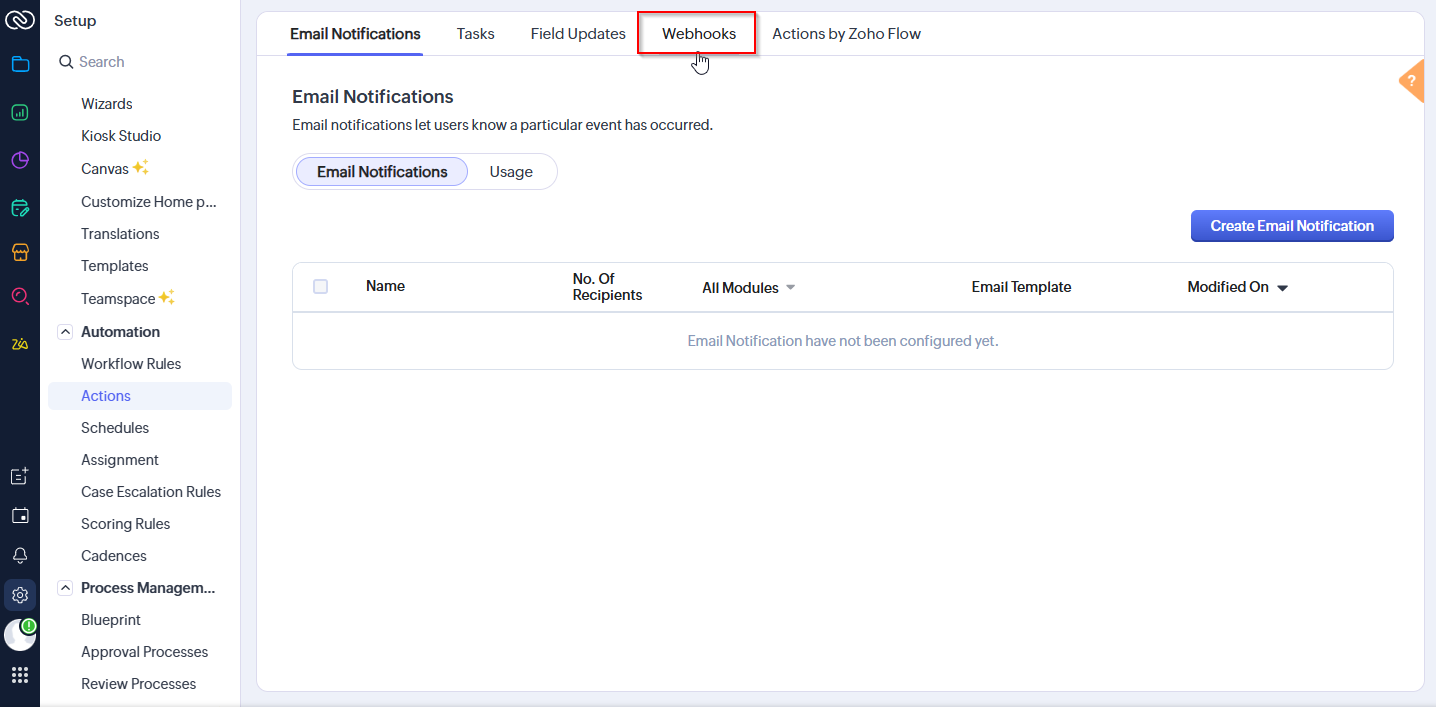
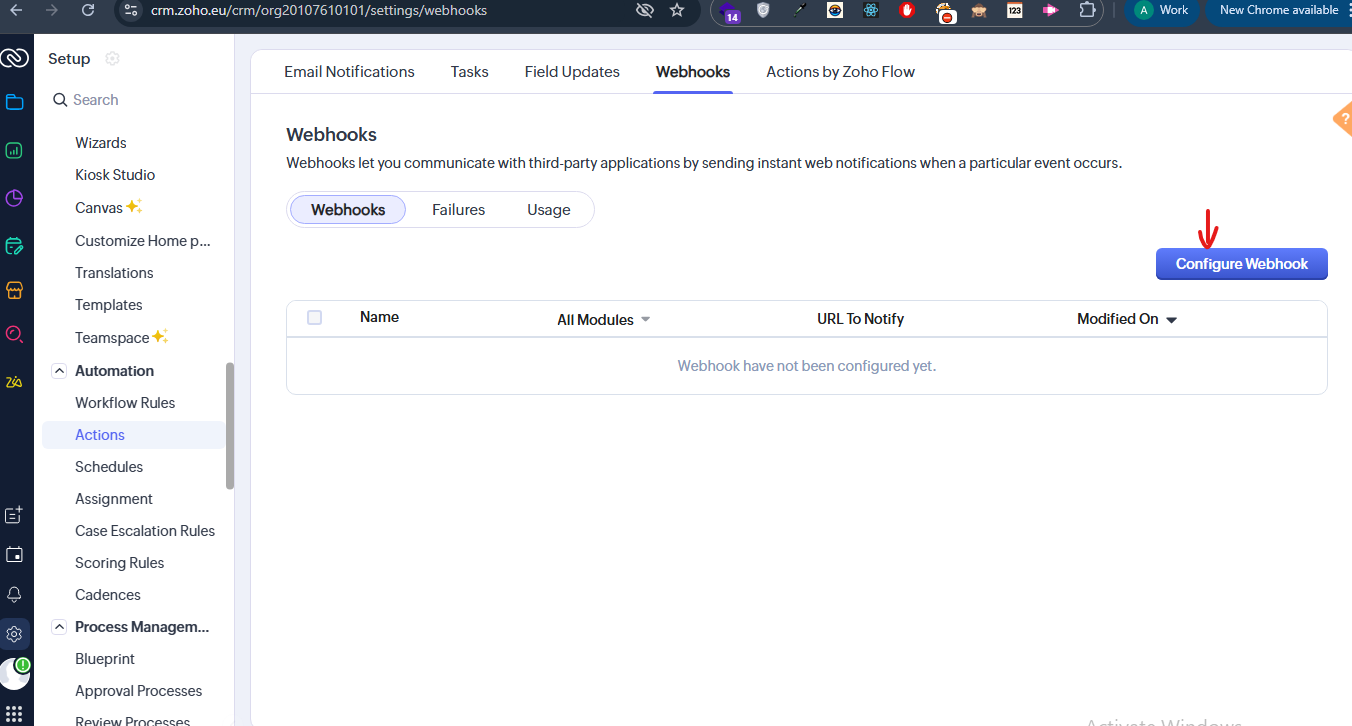
Step 4 At the top of the sidebar, click on Webhooks.
Step 5 Select Configure Webhooks.
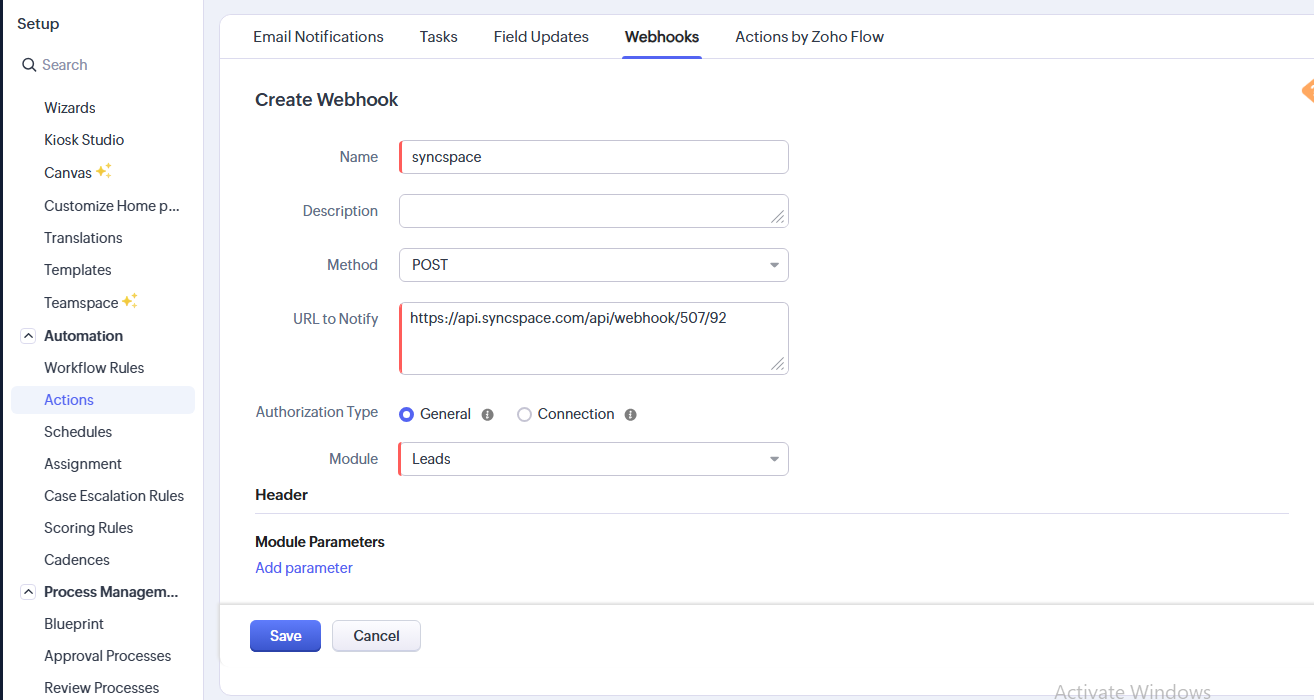
Step 6 Add your webhook by entering the Notify URL, Name, Method as POST, and Module as Leads.
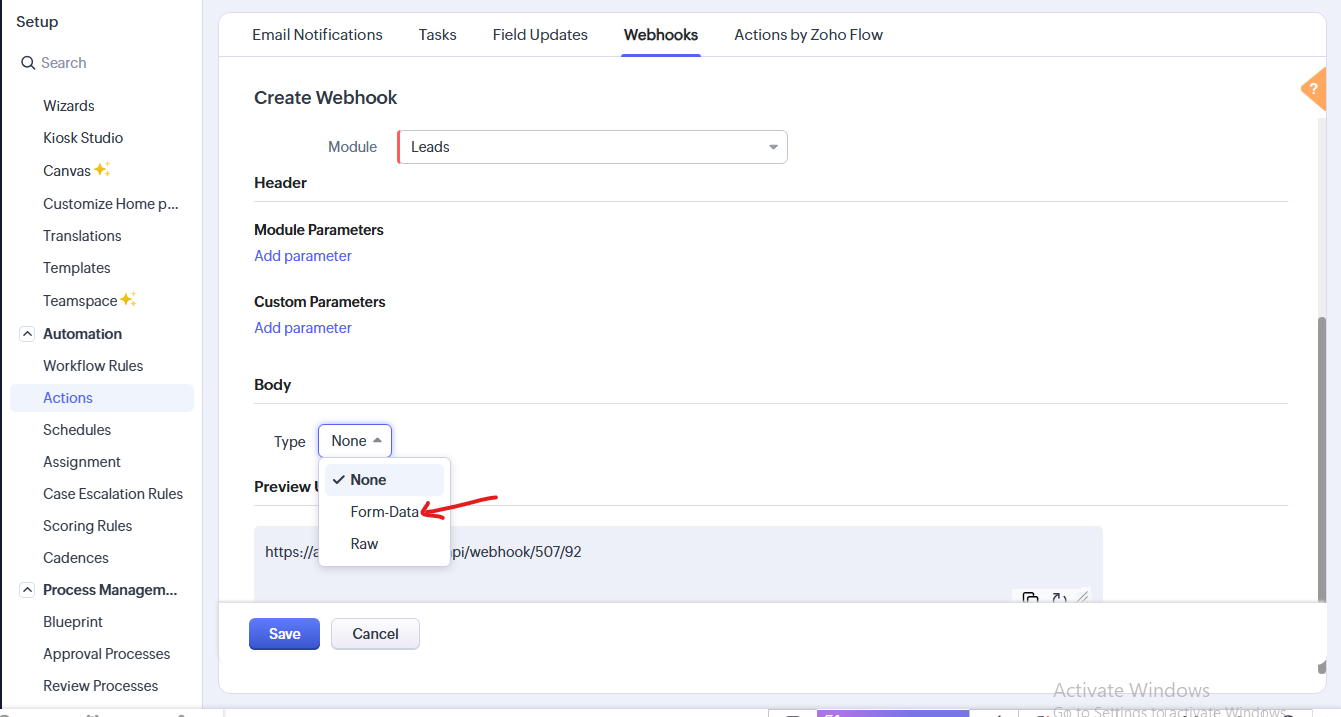
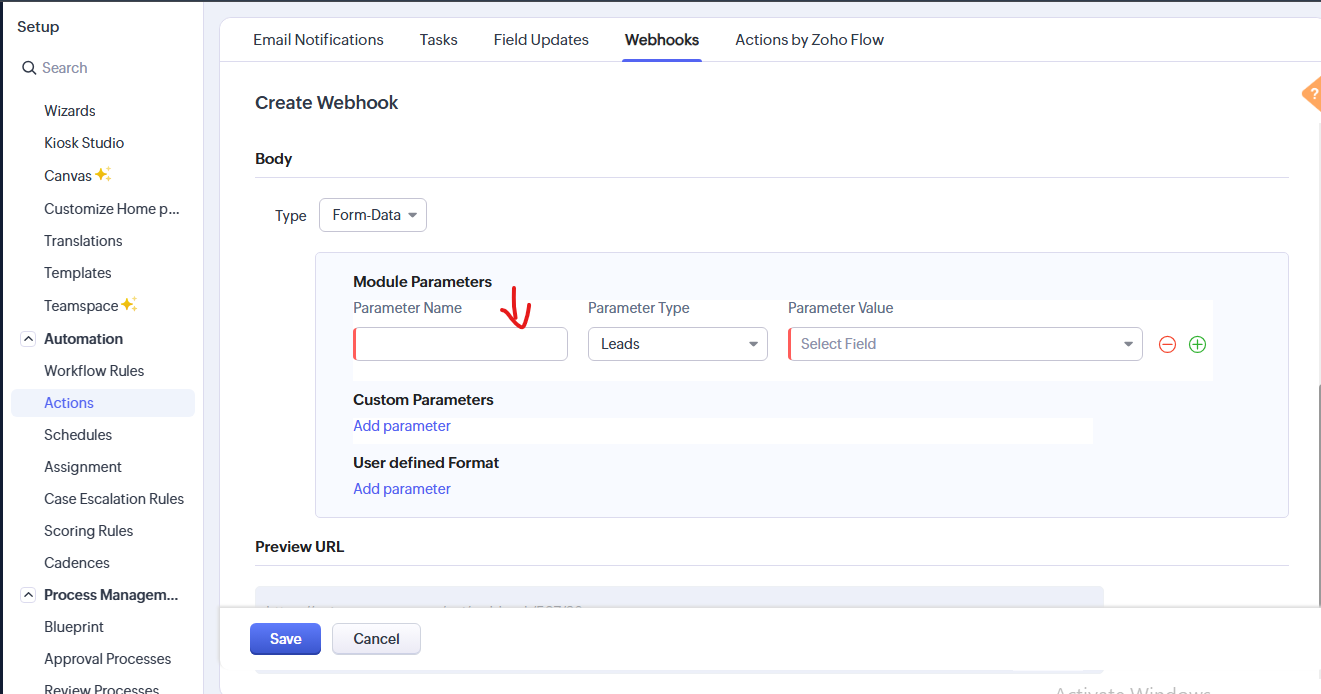
Step 7 In the Body, select Form Data from the type dropdown.
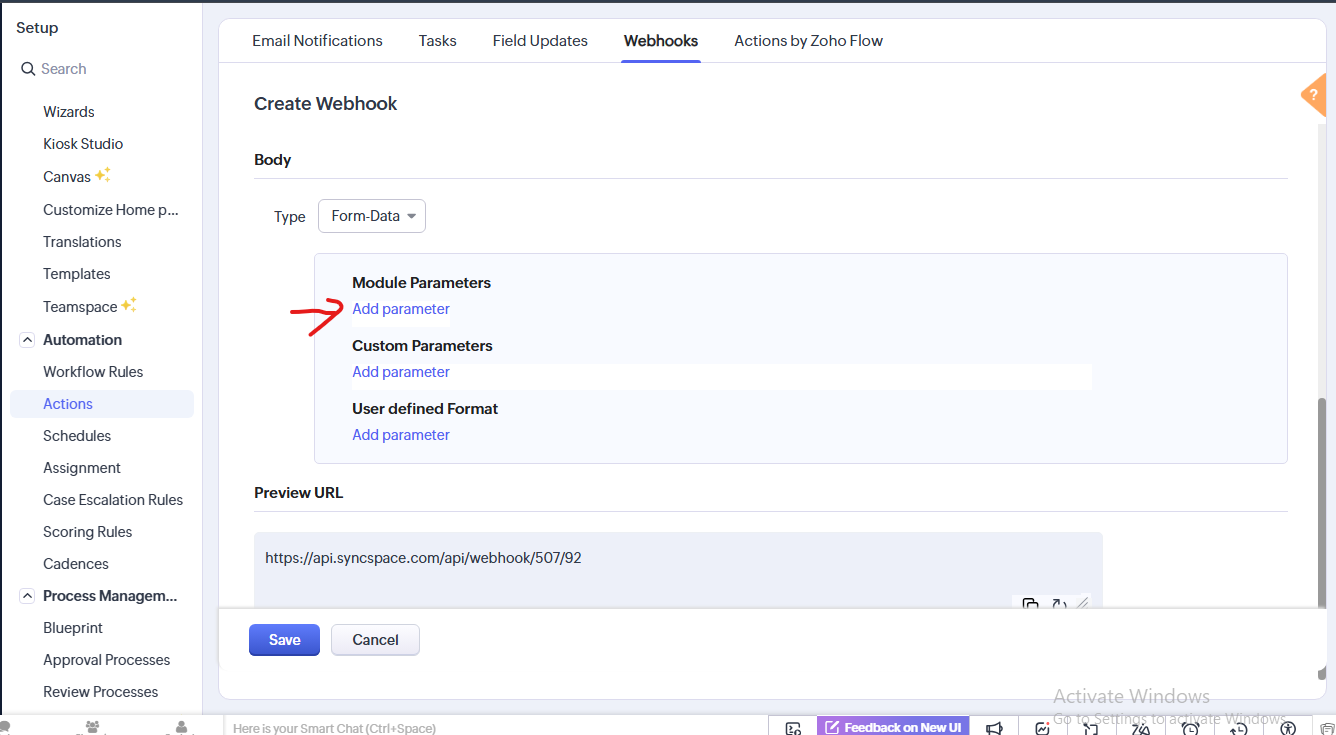
Step 8 Add the required parameters under Module Parameters.
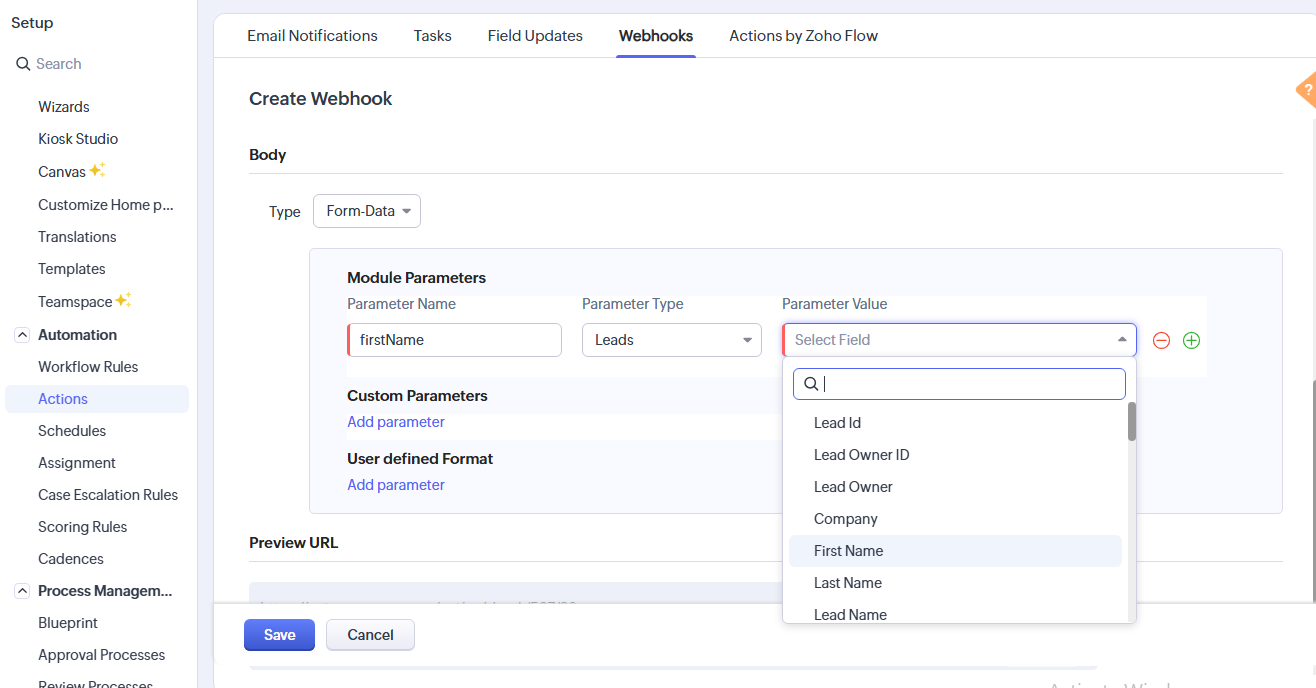
Step 9 For each parameter, provide the Parameter Name, Parameter Type (choose Leads), and Parameter Value.
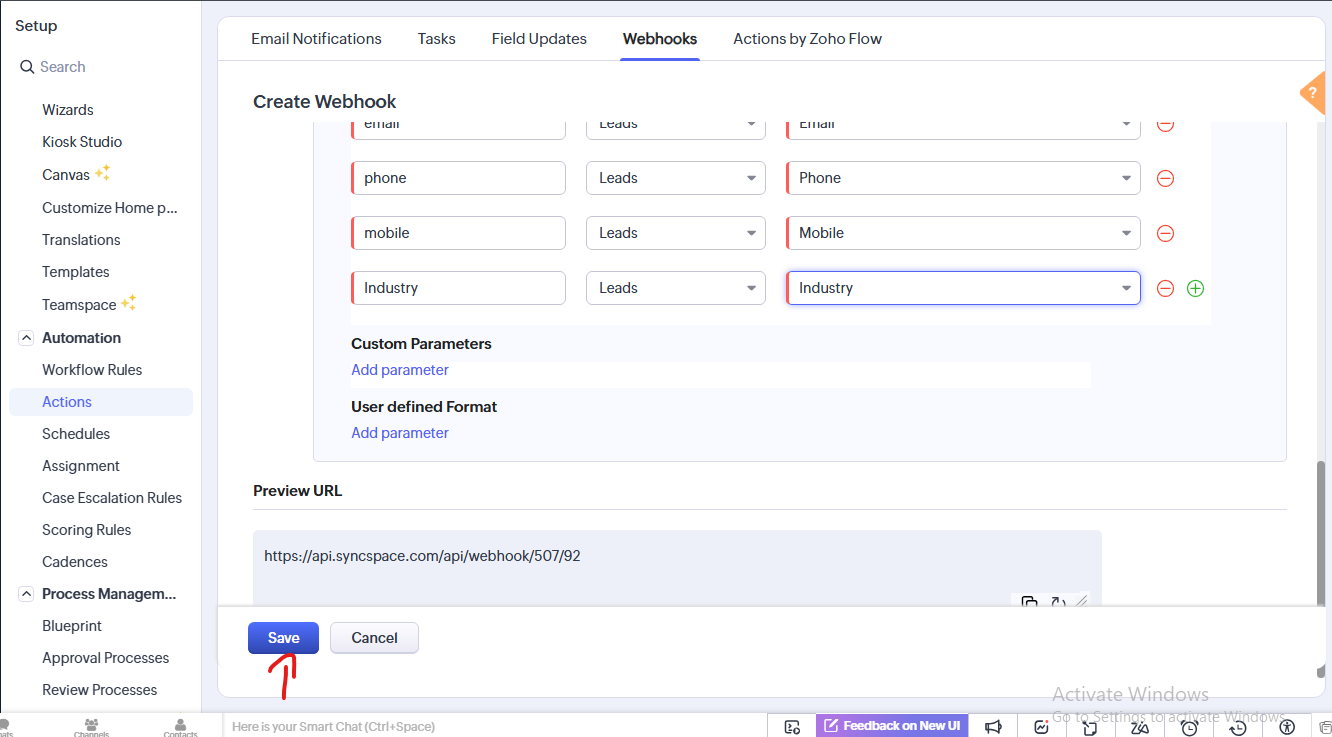
Step 10 Add all the necessary parameters by selecting the respective fields from the dropdown.
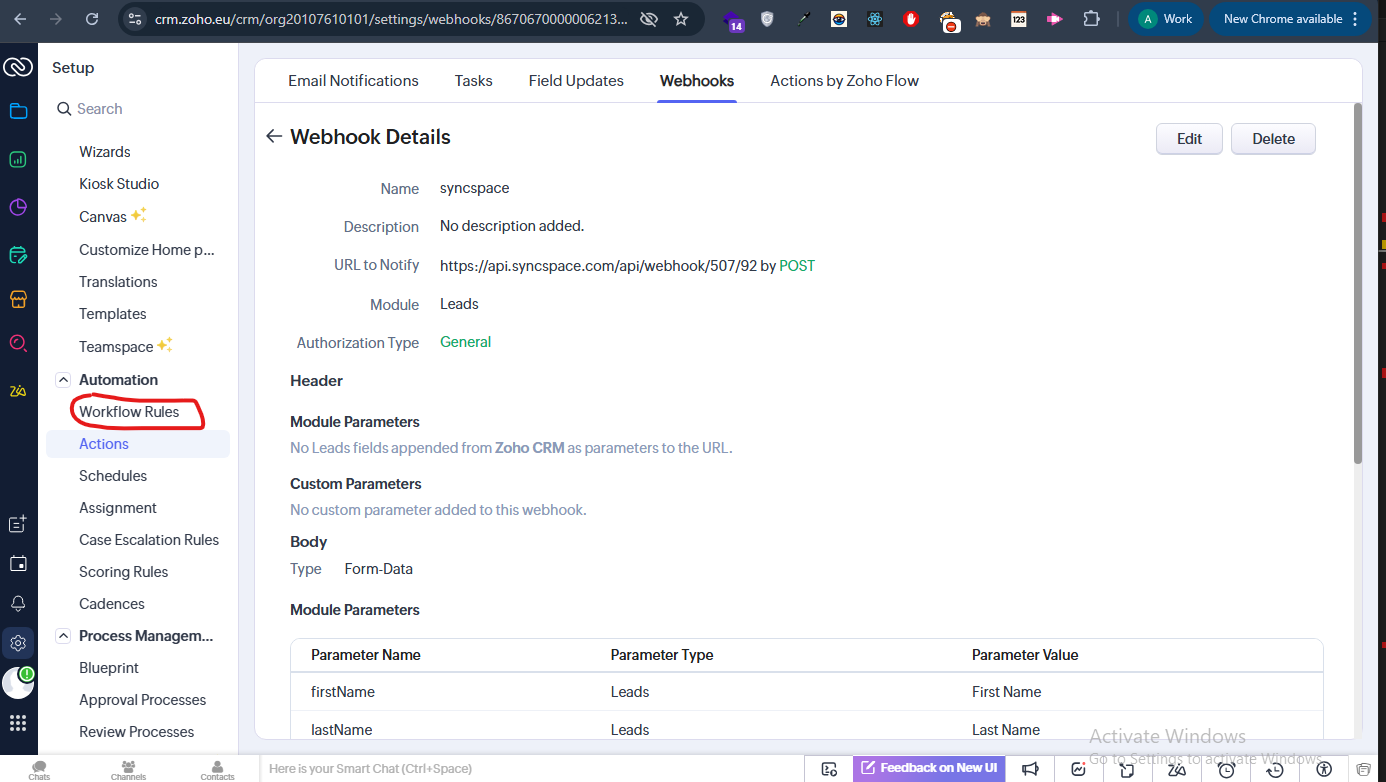
Step 11 Save all your settings and parameters.
Step 12 Now, go to Workflow Rules from the sidebar.
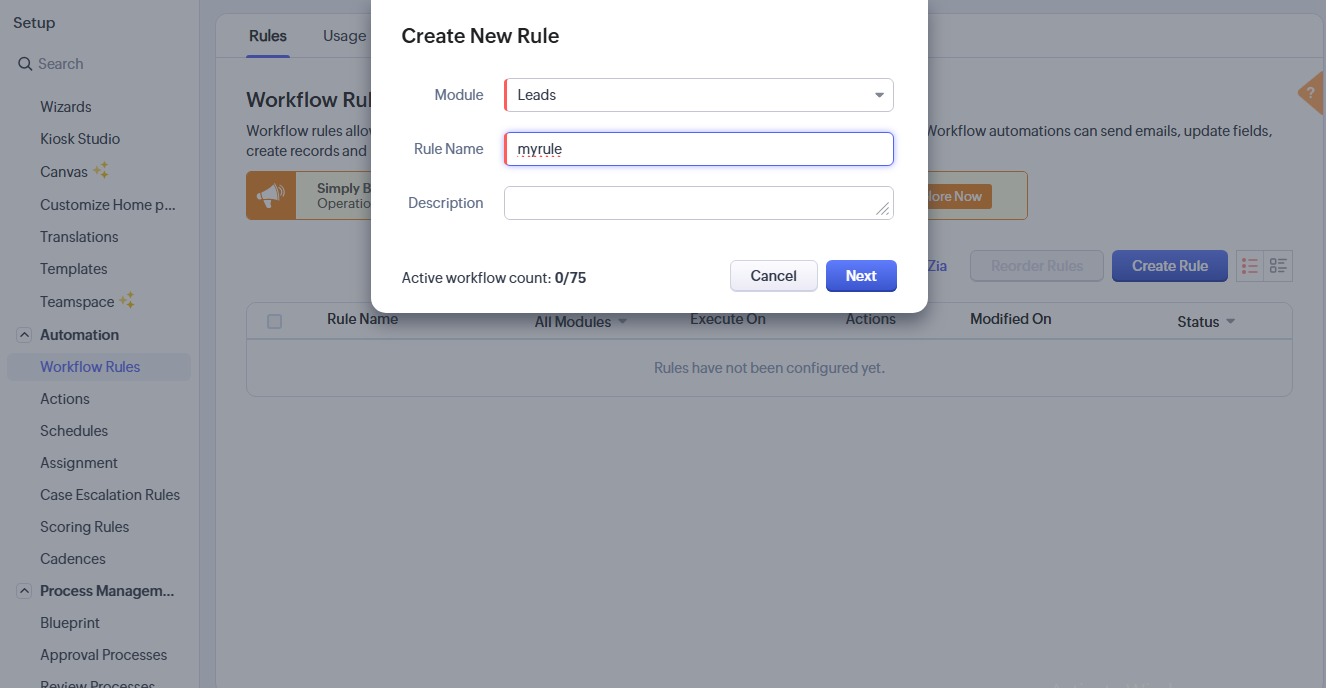
Step 13 Click the Create Rule button.

Step 14 In the new rule window, select the Module as Leads.

Step 15 Enter your Rule Name and click Next.
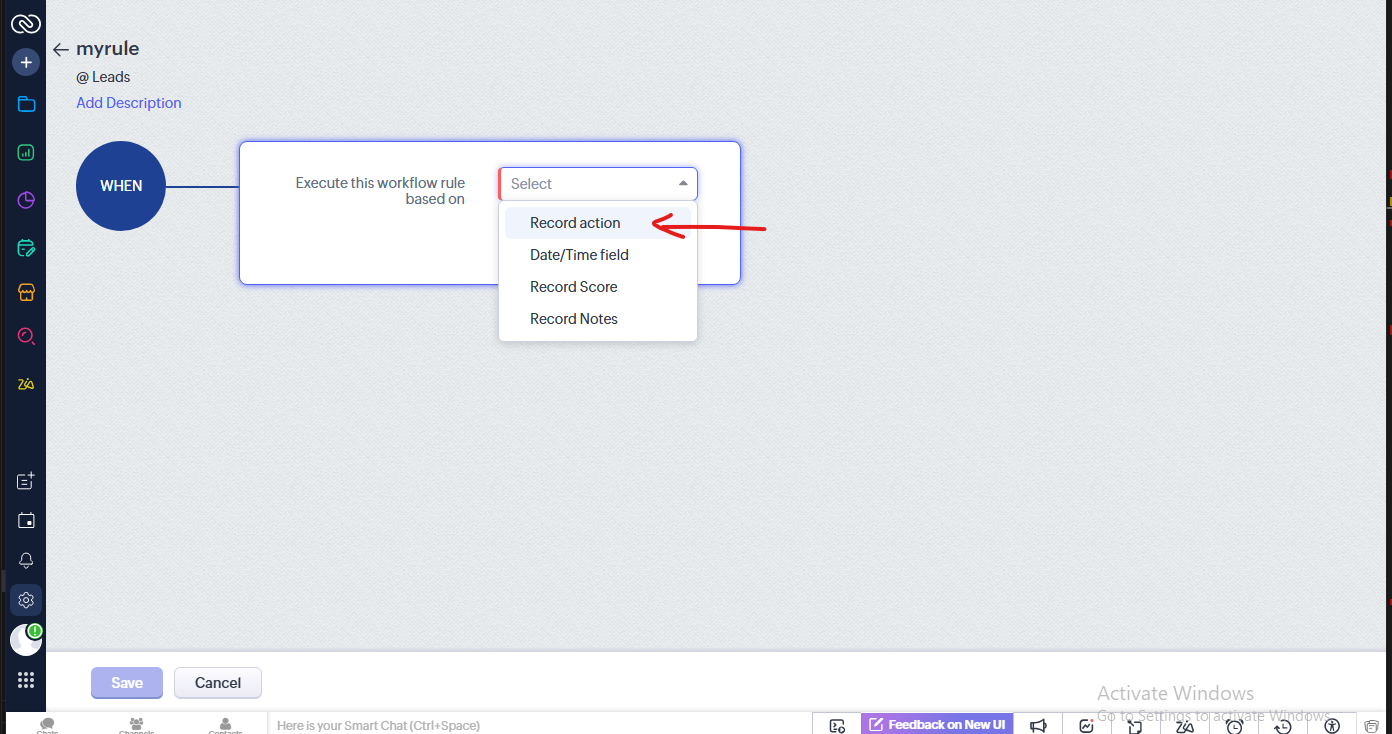
Step 16 In the next screen, choose Record Action under the “Execute Workflow” section.
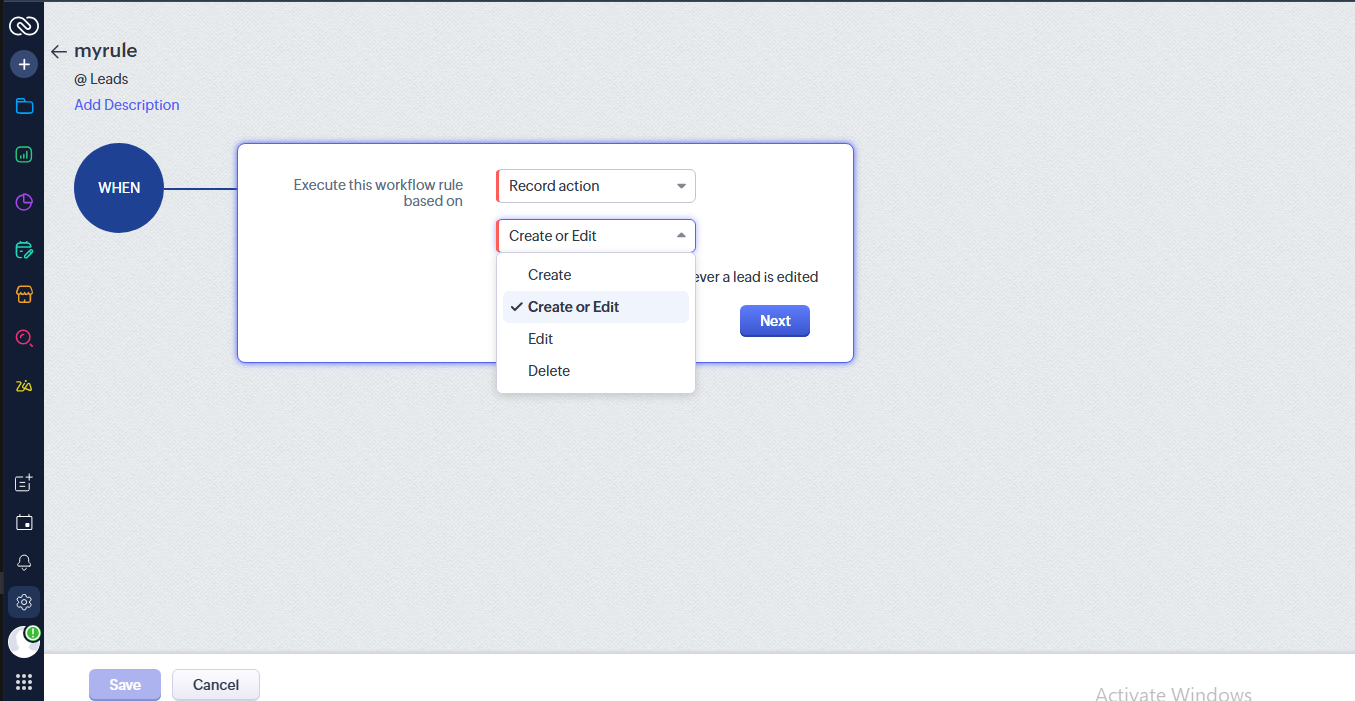
Step 17 From the dropdown, select Create or Edit from the Dropdown
Click Next afterwards
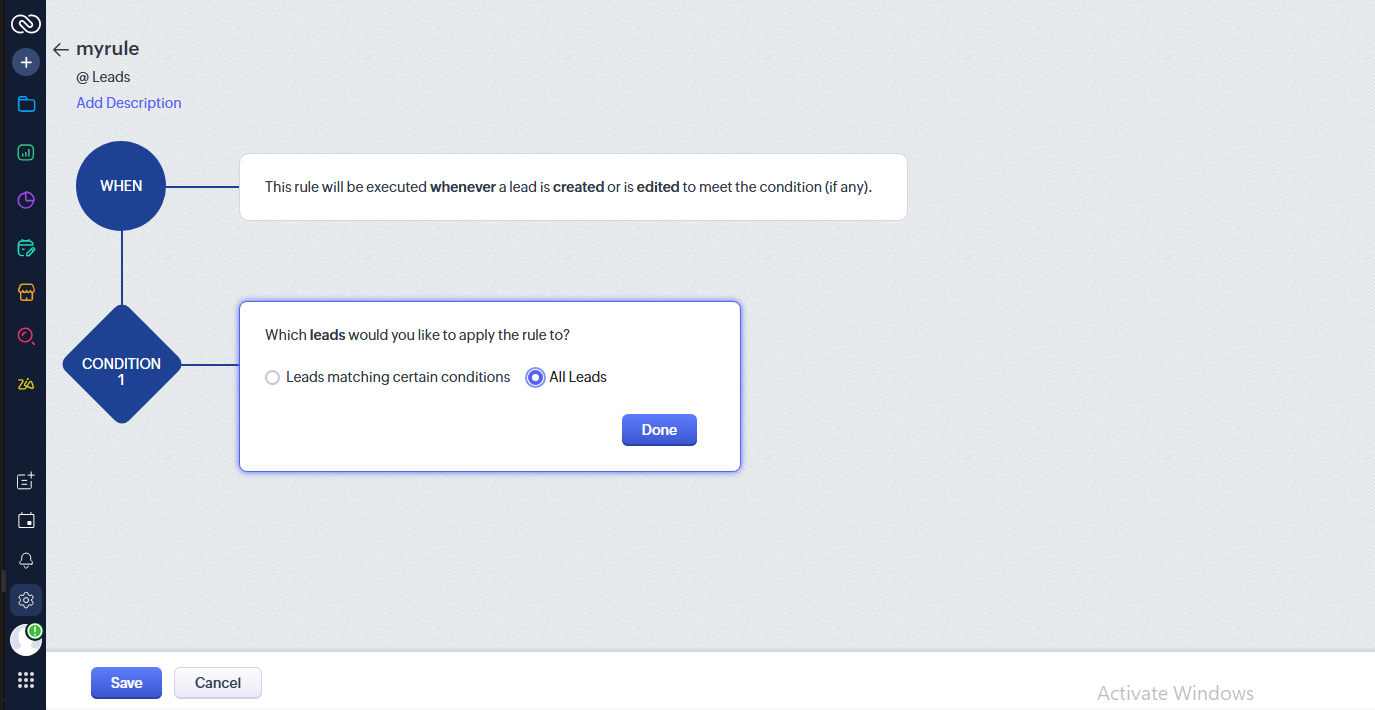
Step 18 Choose the All Leads checkbox in the conditions section to define where the workflow should apply.
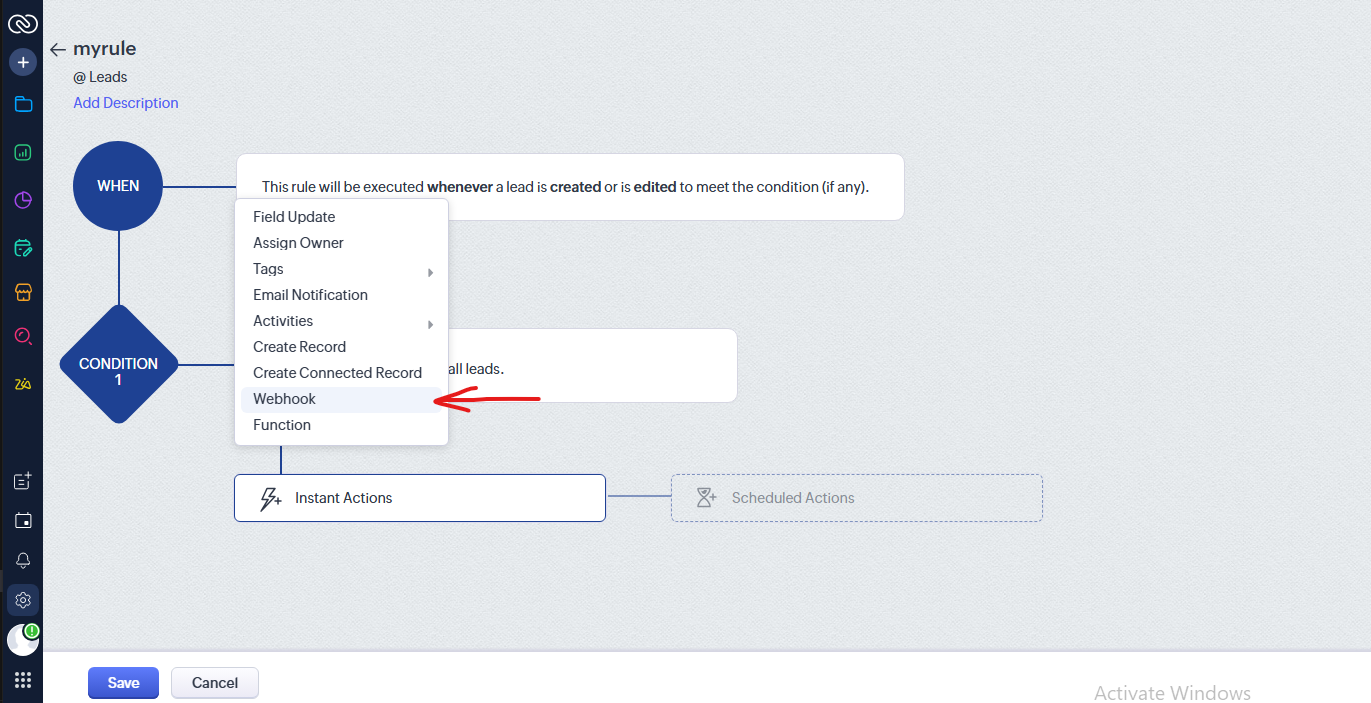
Step 19 Add Webhooks as an Instant Action.
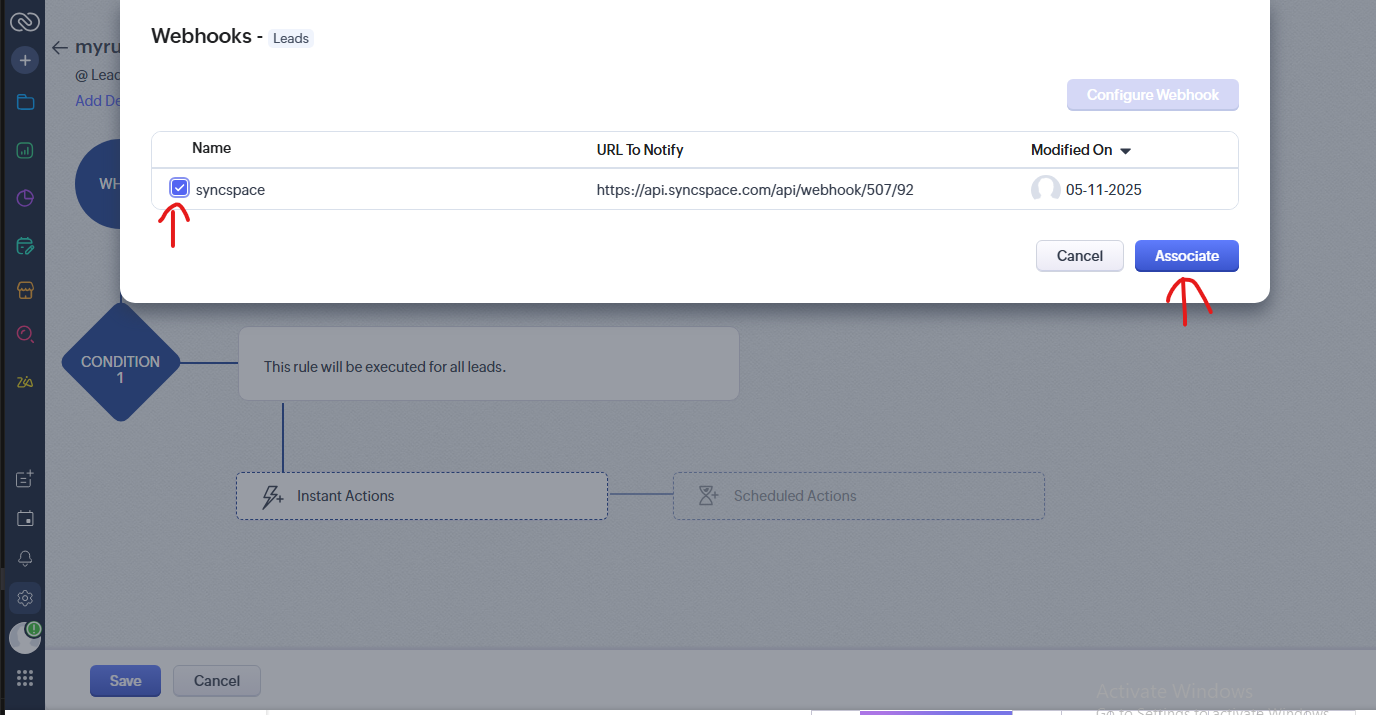
Step 20 Associate the webhook you created earlier.
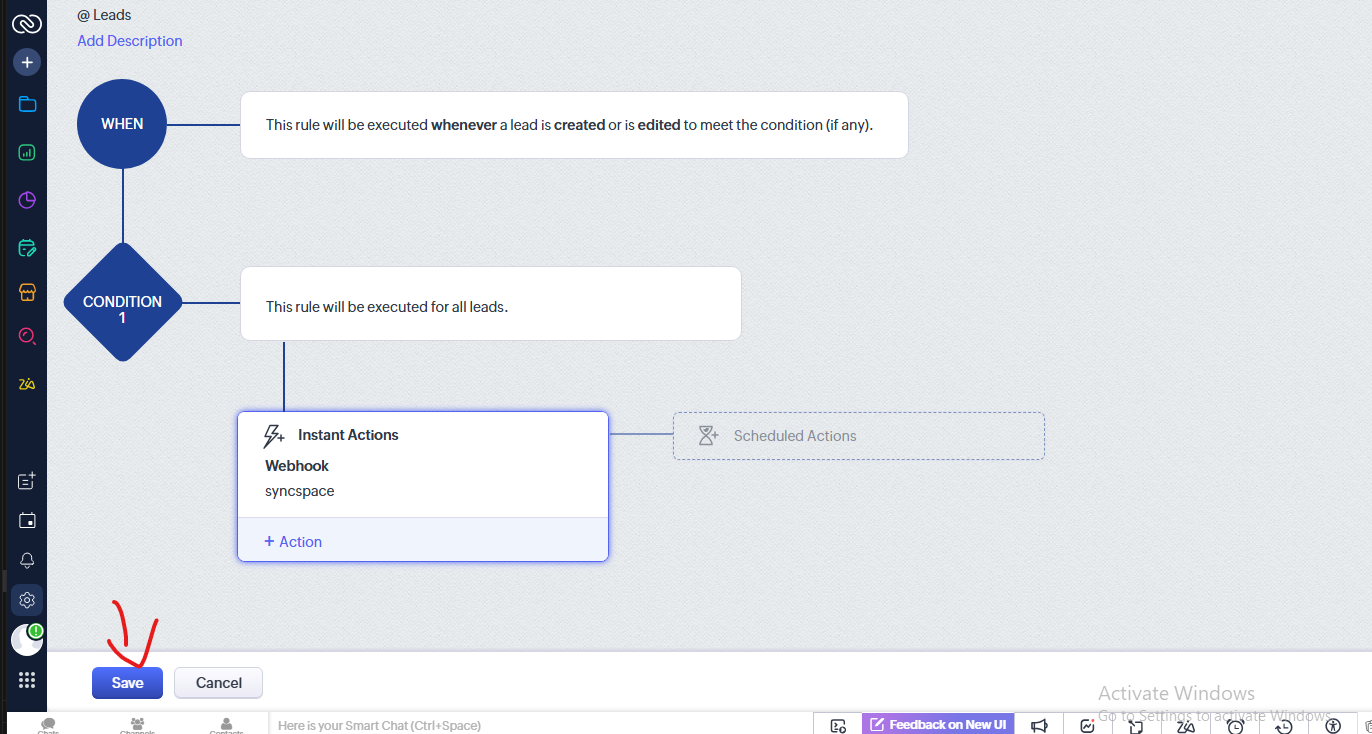
Step 21 Your webhook is now connected for all leads. Finally, click Save to apply the workflow settings
Log in to your Zoho CRM dashboard.
In the dashboard, click the Settings icon located in the rightmost sidebar.
Under Settings, go to Action and click on it.
At the top of the sidebar, click on Webhooks.
Select Configure Webhooks.
Add your webhook by entering the Notify URL, Name, Method as POST, and Module as Leads.
In the Body, select Form Data from the type dropdown.
Add the required parameters under Module Parameters.
For each parameter, provide the Parameter Name, Parameter Type (choose Leads), and Parameter Value.
Add all the necessary parameters by selecting the respective fields from the dropdown.
Save all your settings and parameters.
Now, go to Workflow Rules from the sidebar.
Click the Create Rule button.
In the new rule window, select the Module as Leads.
Enter your Rule Name and click Next.
In the next screen, choose Record Action under the “Execute Workflow” section.
From the dropdown, select Create or Edit from the Dropdown
Choose the All Leads checkbox in the conditions section to define where the workflow should apply.
Add Webhooks as an Instant Action.
Associate the webhook you created earlier.
Your webhook is now connected for all leads. Finally, click Save to apply the workflow settings