Send MyOperator Call Details to Odoo

MyOperator to Odoo Integration Guide

With Syncspace, you can automatically send new call data or contact details from MyOperator directly to your Odoo database—no coding or technical skills required. Your data flows automatically from one platform to the other.
Just follow the steps in this guide, and your MyOperator call records or contacts will start showing up in Odoo automatically.

It’s fast, simple, and saves you time.

Prerequisites:

  • You have access to a MyOperator account and an active Odoo instance.

  • You are logged in to both platforms.
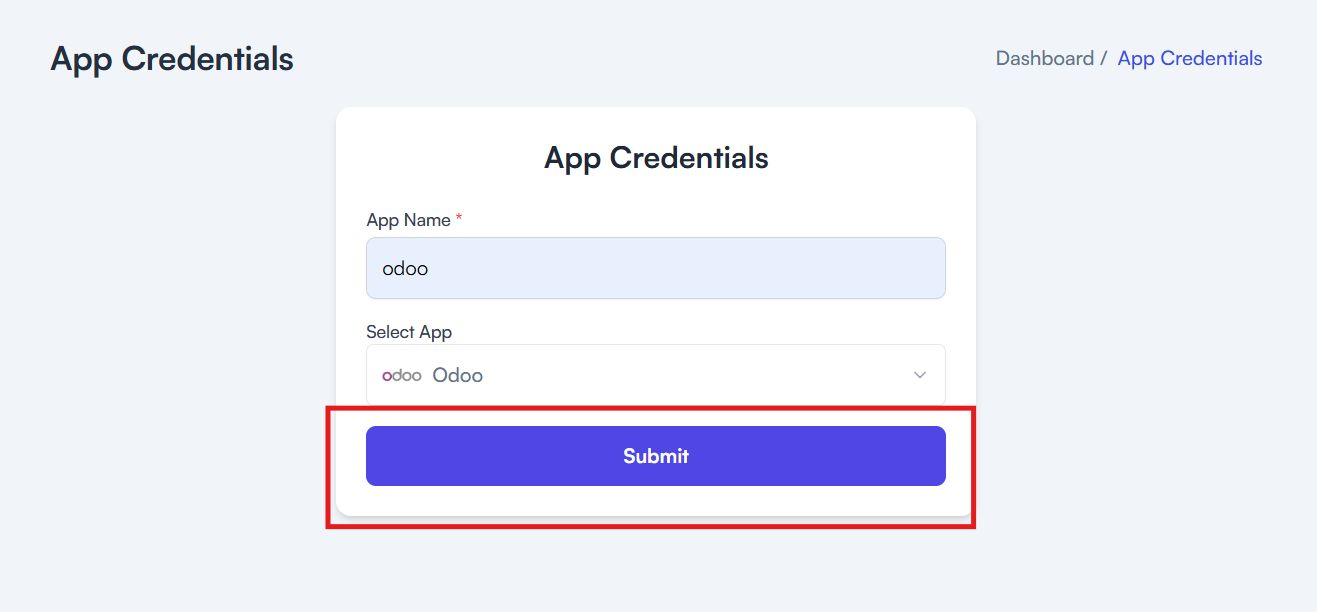
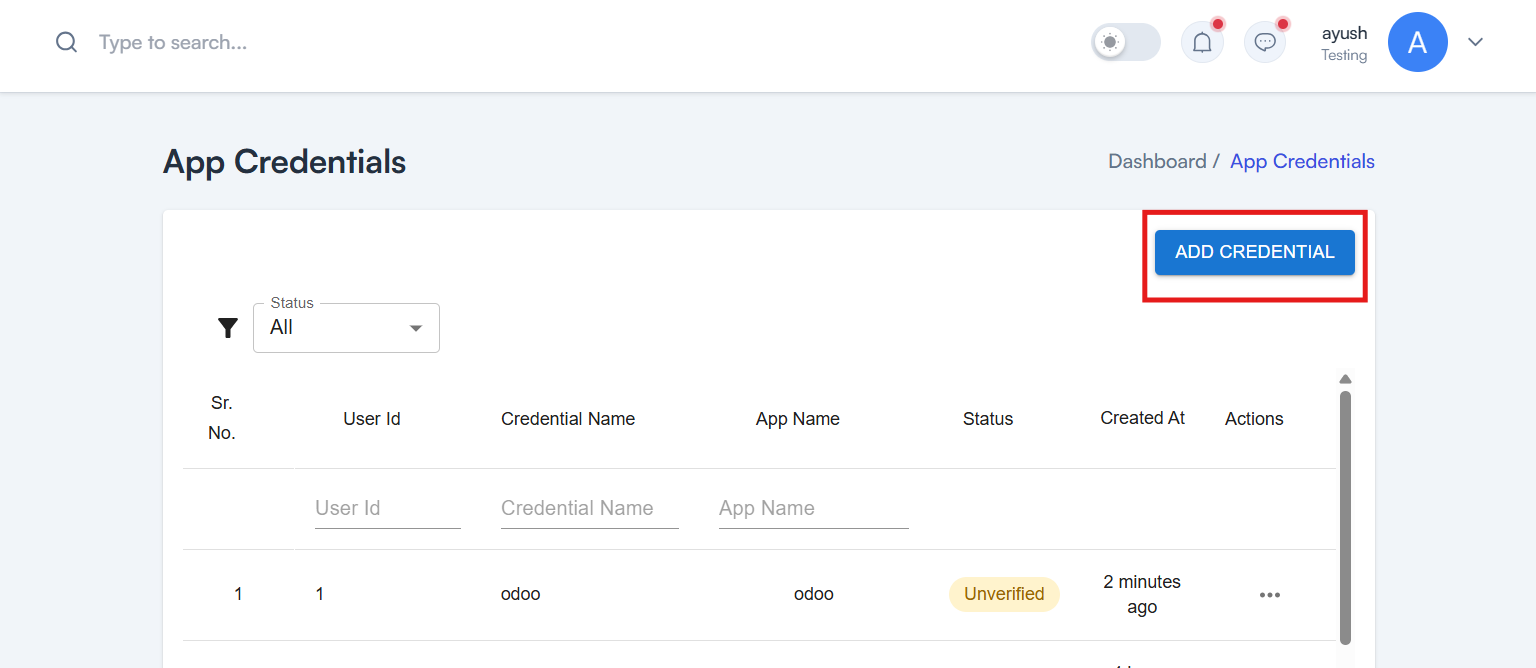
Step 1 Click on App Credentials
Step 2 Create a New Credential
Step 3 Configure App details
  • Add your App Name
  • Select Odoo from the Dropdown
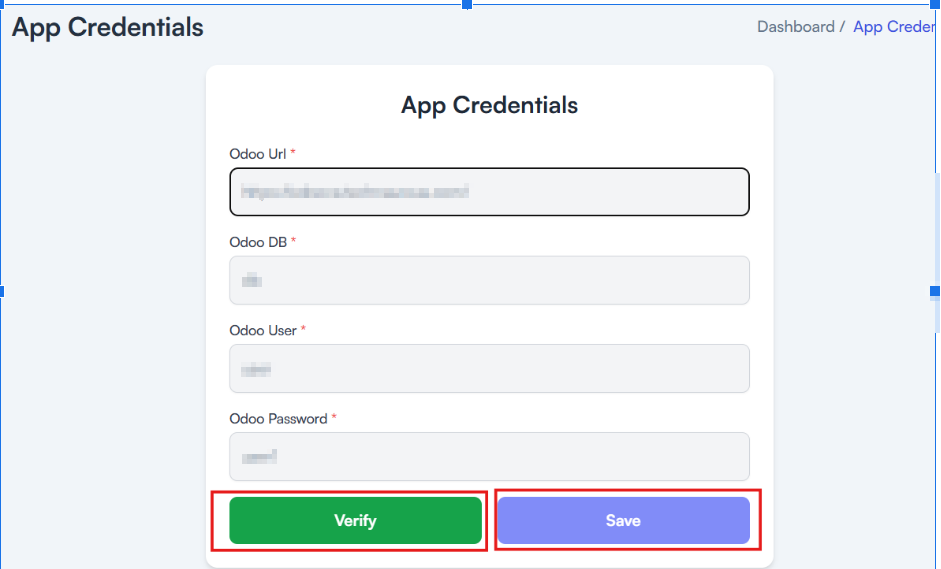
Step 4 Add your Odoo Credentials and click Verify Then Save
  • Add your Odoo URL
  • Add your Odoo DB Name
  • Add your Odoo User
  • Add your Odoo User Password
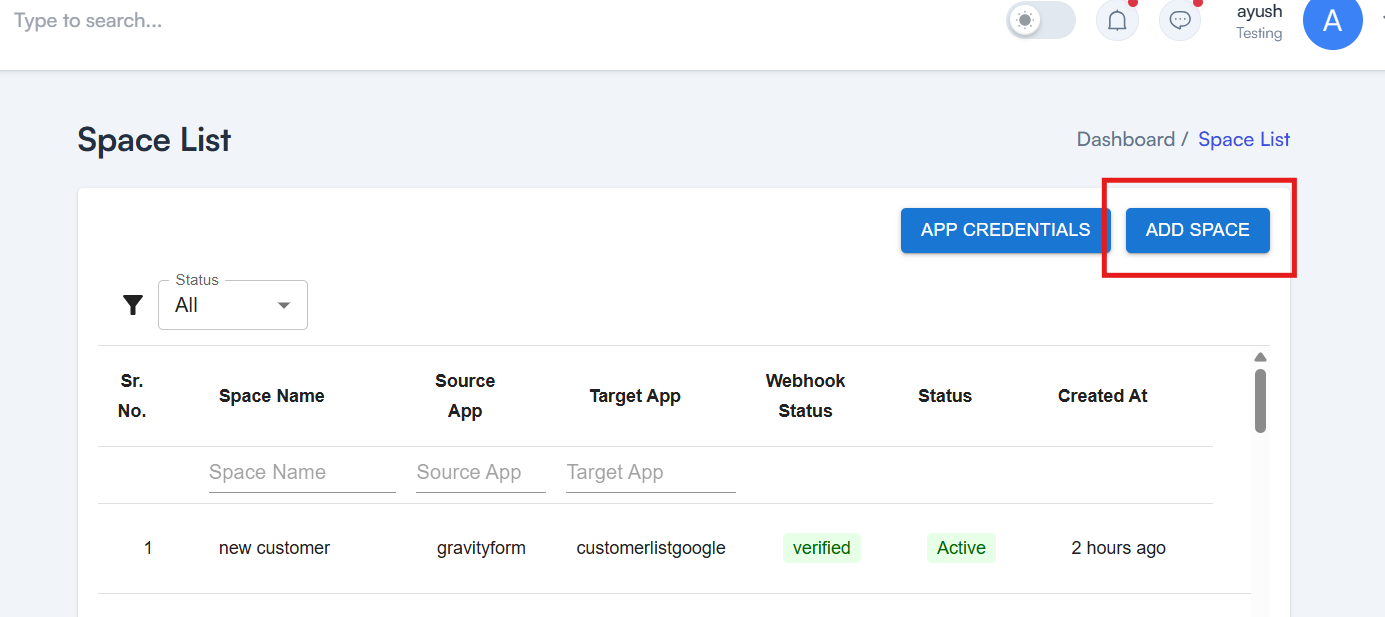
Step 5 Click on Add Space to create a new space
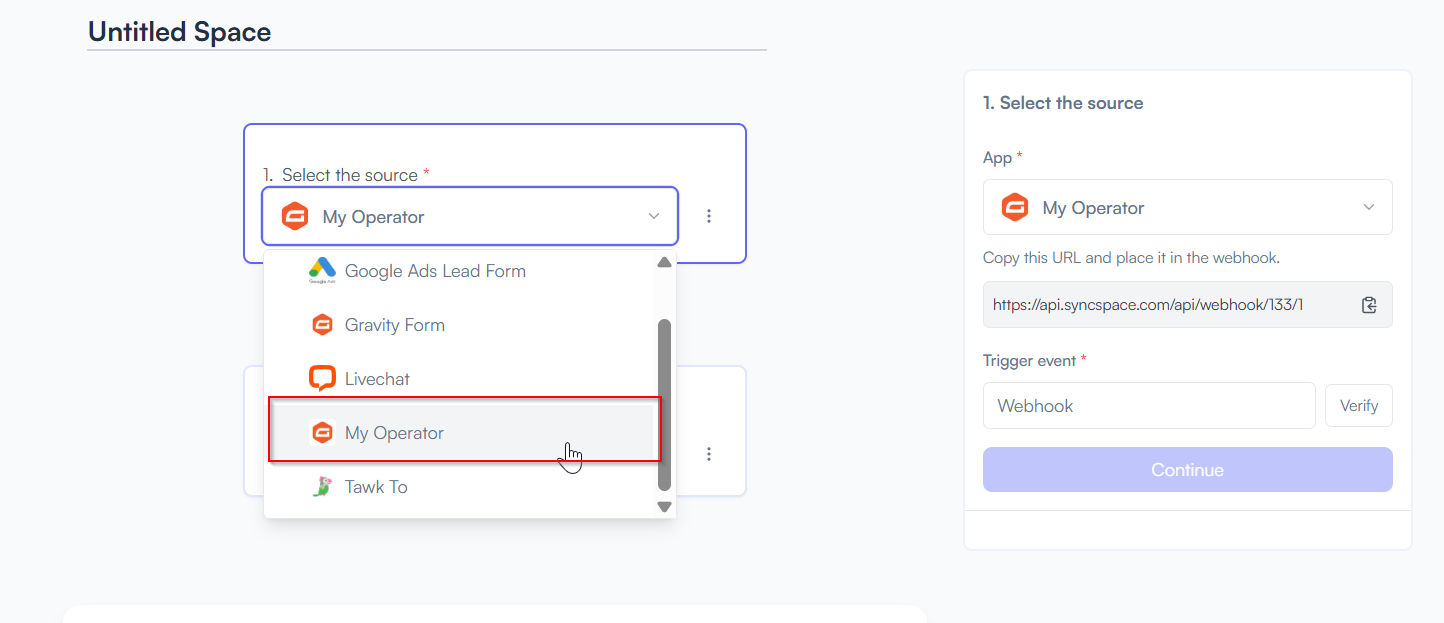
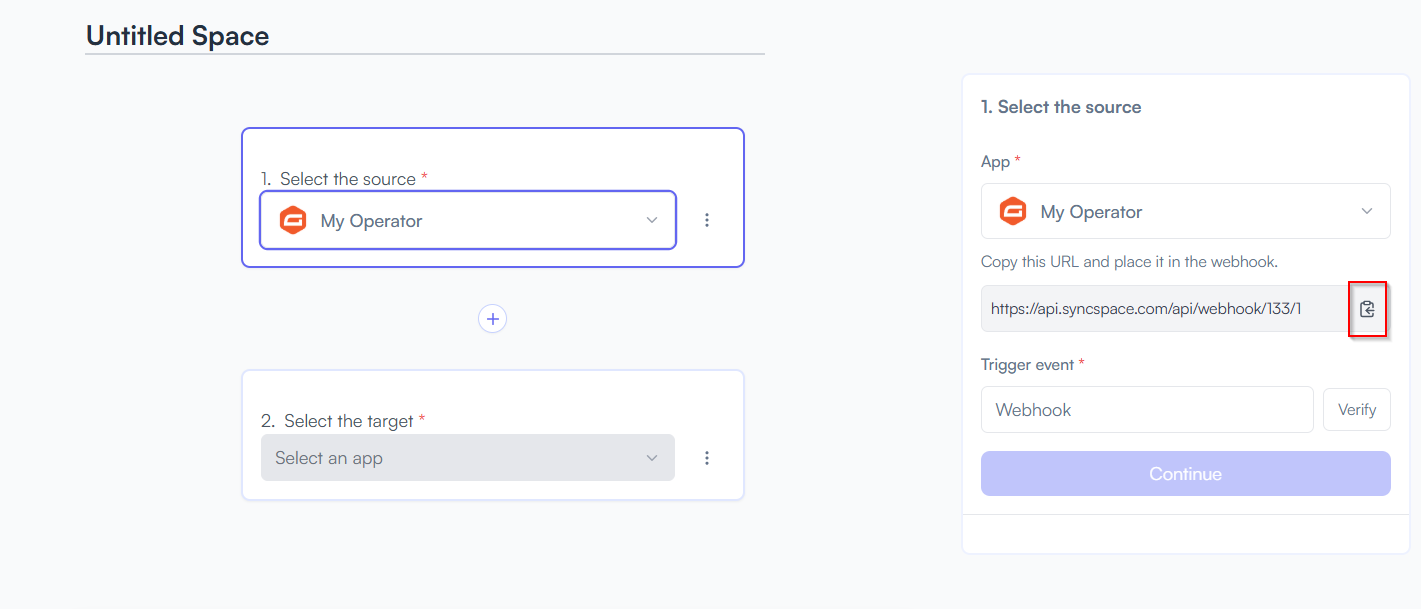
Step 6 Select your Source App from the dropdown and copy webhook URL
  • Choose Myoperator
Step 7 Copy the Webhook URL generated for MyOperator
Step 8 Steps to Verify Webhook in MyOperator
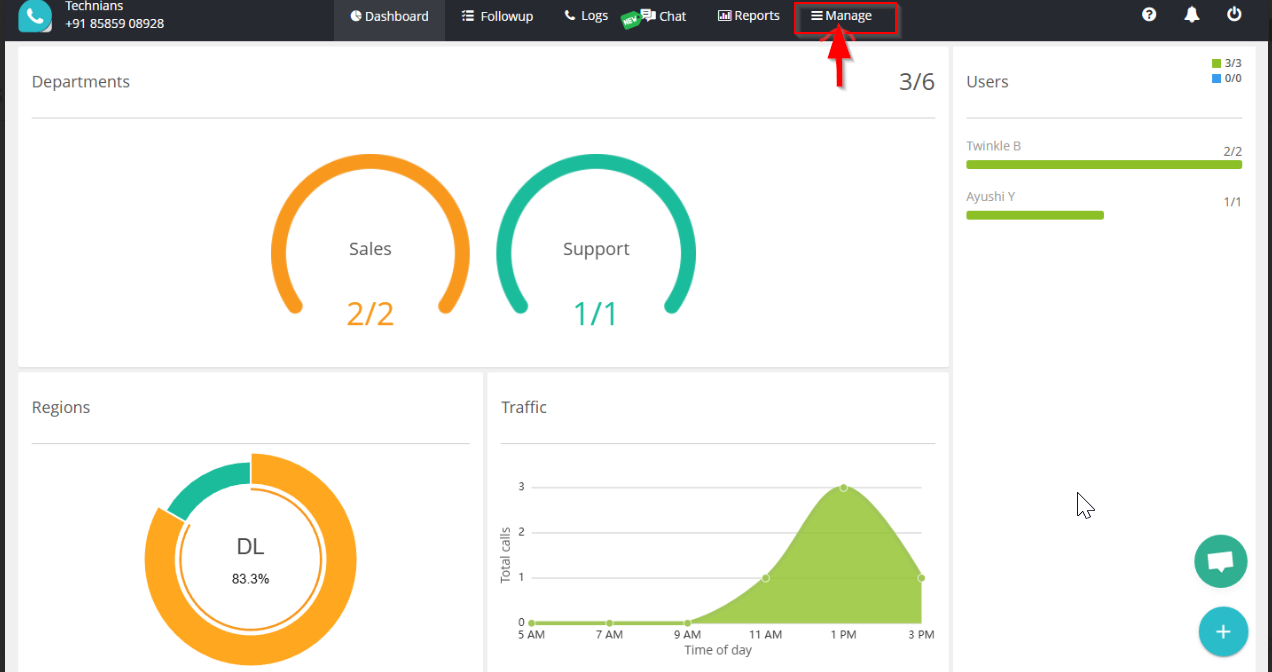
  • Log into your MyOperator account and land on the dashboard.

  • On the top-right corner of the navigation bar, click on Manage
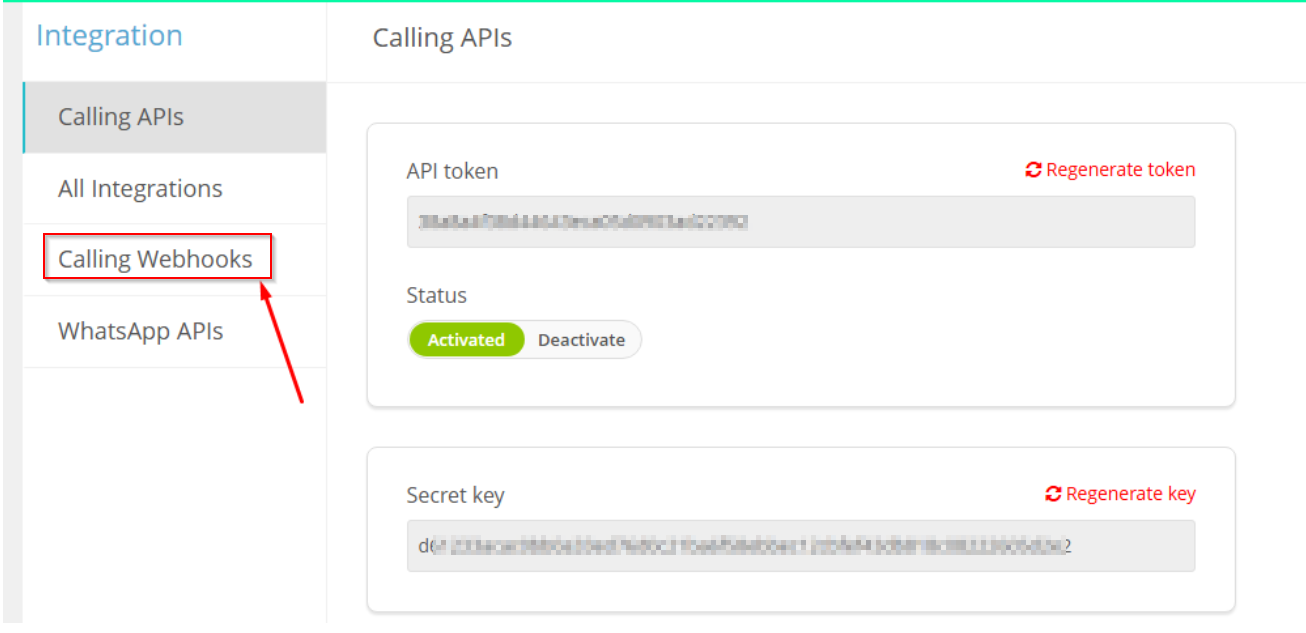
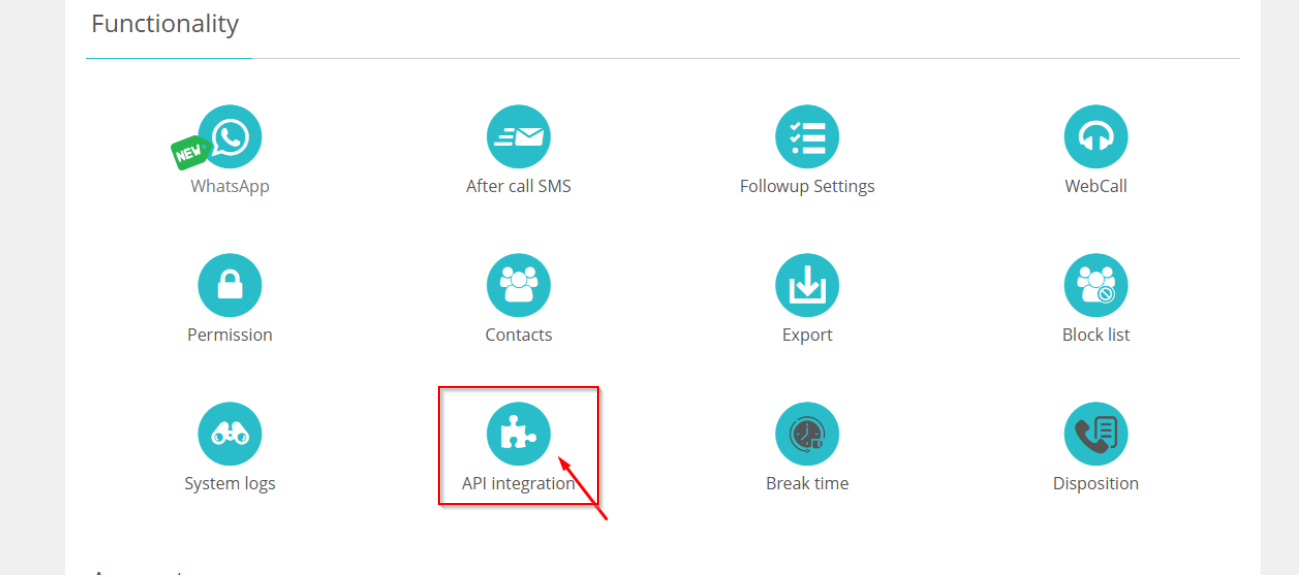
Step 9 Under the Manage section, click on API Integration.

You will be directed to the Integration page.
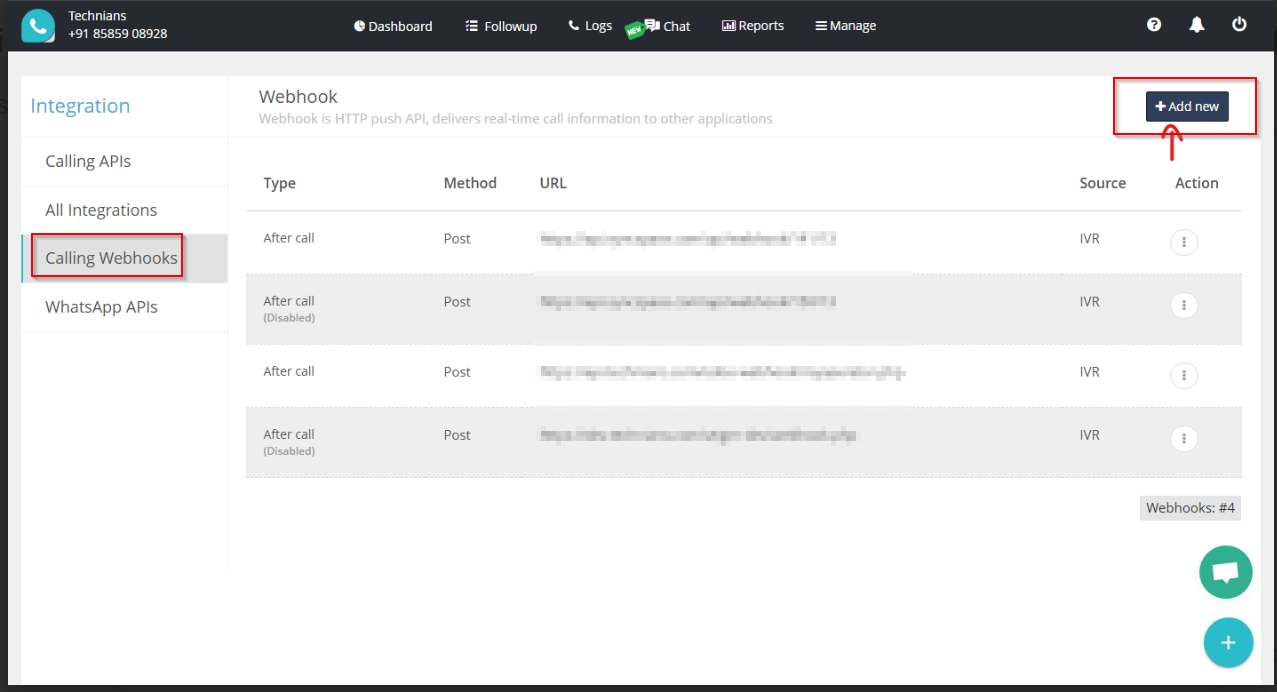
Step 10 On the left sidebar, click on Calling Webhooks.
Step 11 On the new page, click the “Add New” button located at the top-right.
Step 12 Paste your webhook URL into the Target URL field.
  • 📌 Note: Make sure to select POST as the method.

  • 📌 Note: Choose form-data as the Content Type.
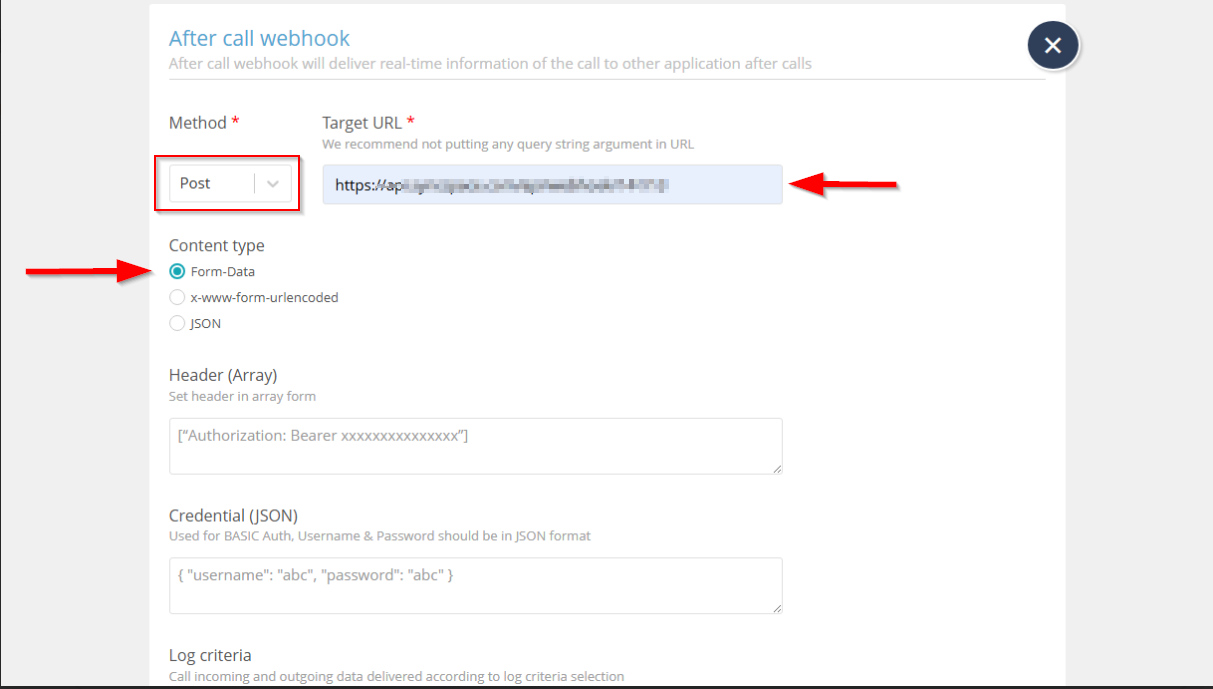
Step 13 Click on “Save” to apply the changes
Step 14 To verify the webhook Call the number 98999xxxxx through a number registered with your MyOperator account.

📝 Note: This step is mandatory to verify that the webhook is correctly configured and receiving data.
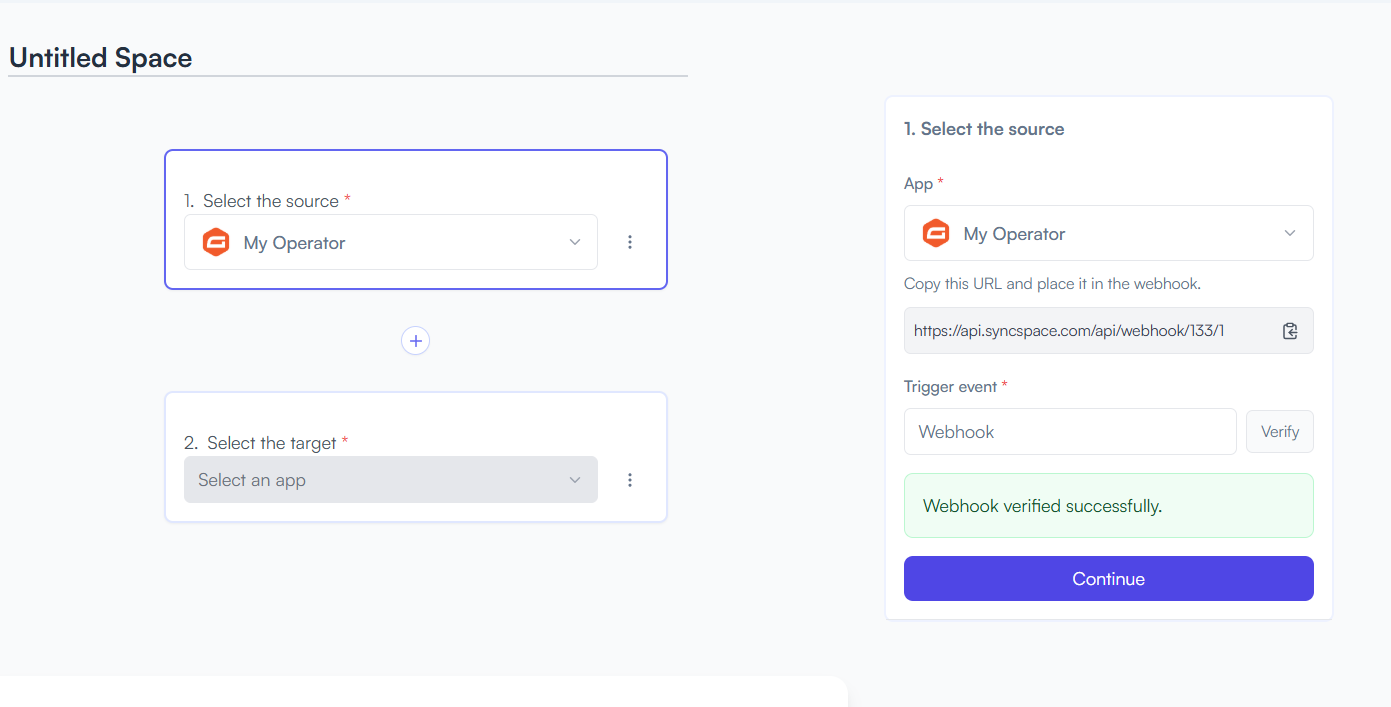
Step 15 Go back to the integration platform and click Verify Webhook, then click Continue
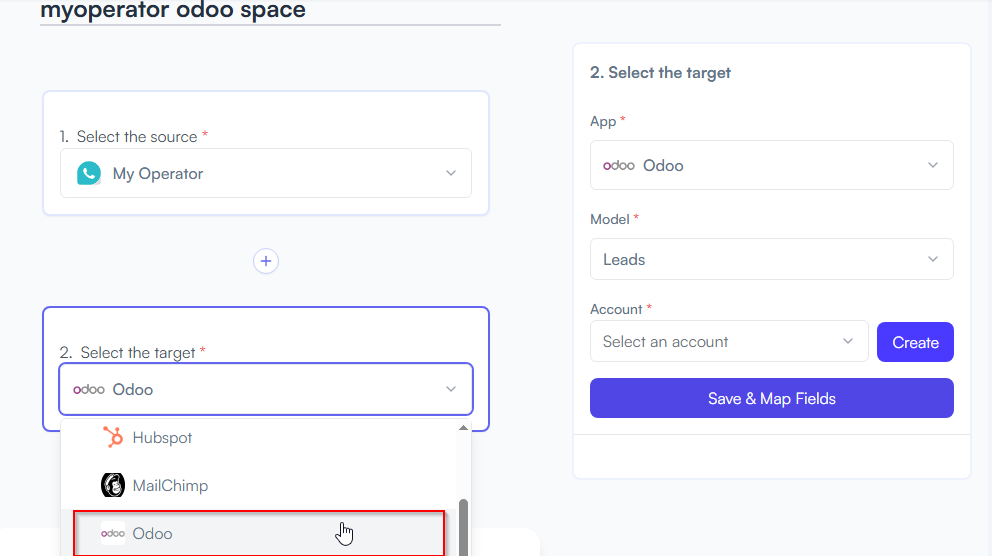
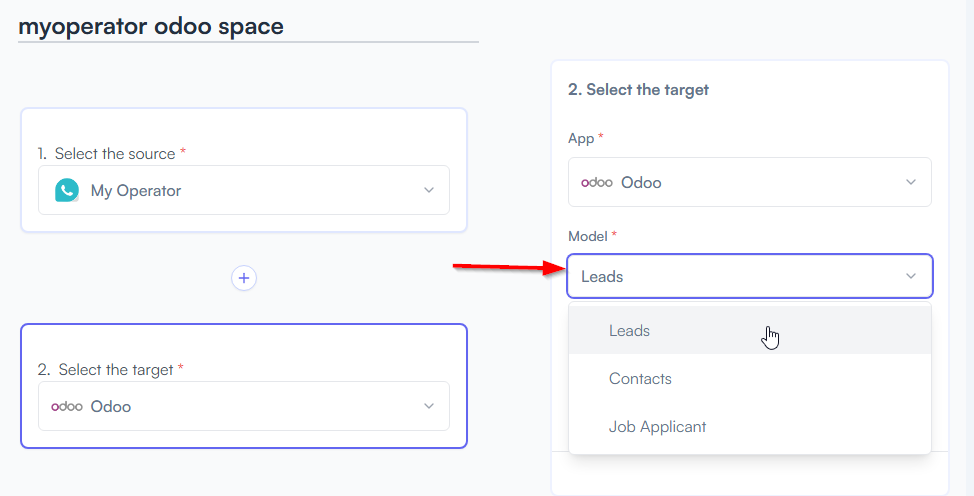
Step 16 Select your Target App from the dropdown
  • Choose Odoo
Step 17 Choose the appropriate Odoo Model accordingly.
  • Example: Leads, Contacts, Job applicant, etc.
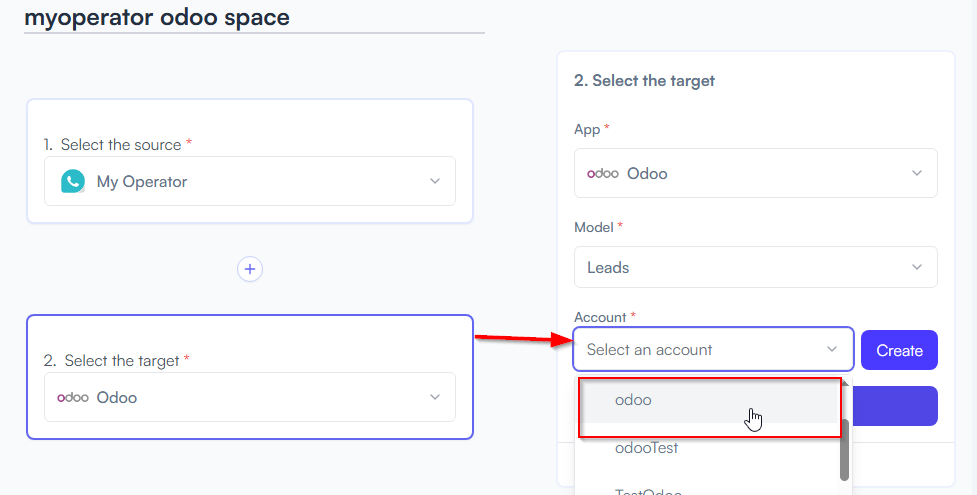
Step 18 Select the Odoo account you created earlier while setting up your app credentials.
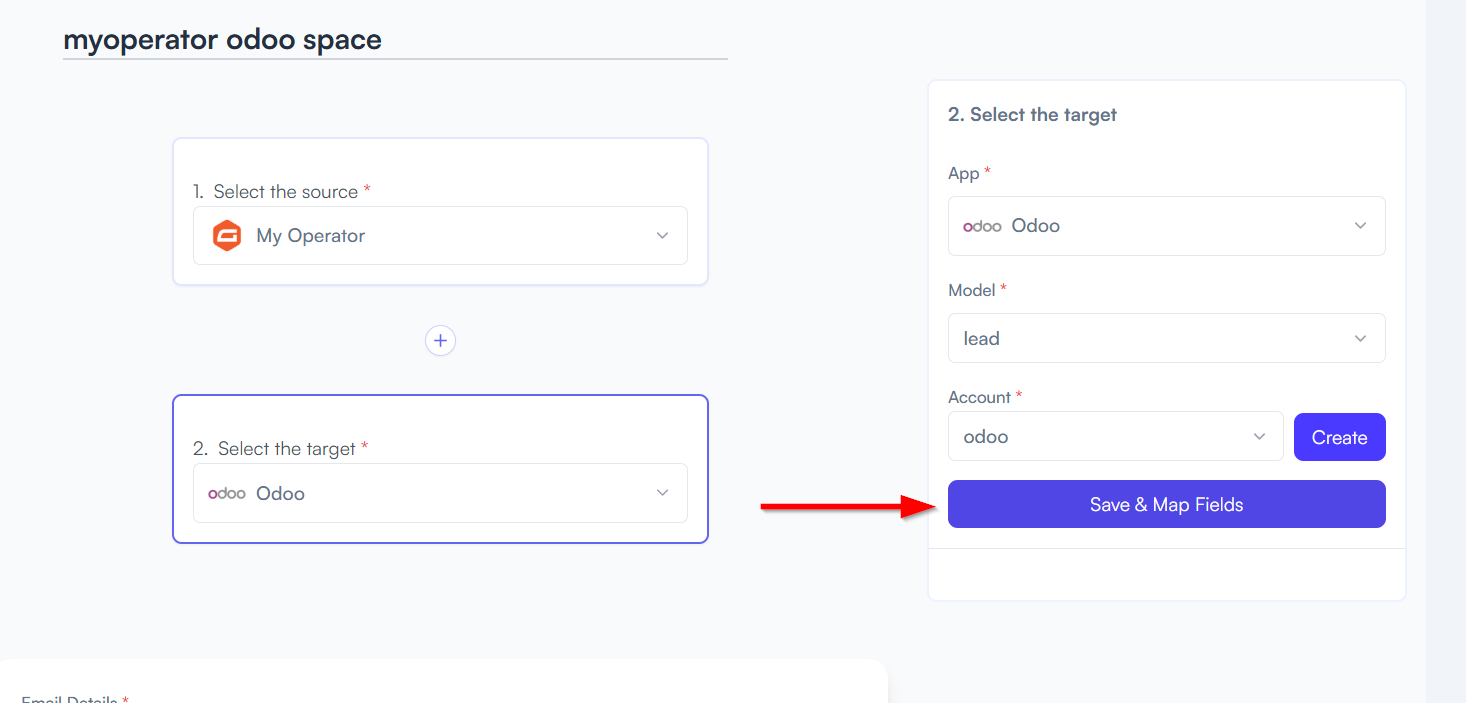
Step 19 Click on the "Save and Map Fields" button
Step 20 Match My Operator fields to the correct Odoo fields
  • Example: Name → Full Name, Email → Email, Chat Transcript → Notes
Step 21 Choose how you want to save your space

You will see two buttons: Save as Draft and Save and Activate.

  • Click Save and Activate, your space will be saved and activated automatically.

  • Click Save as Draft, This will save your space, but it won’t be active. You can activate it later by following the next steps.
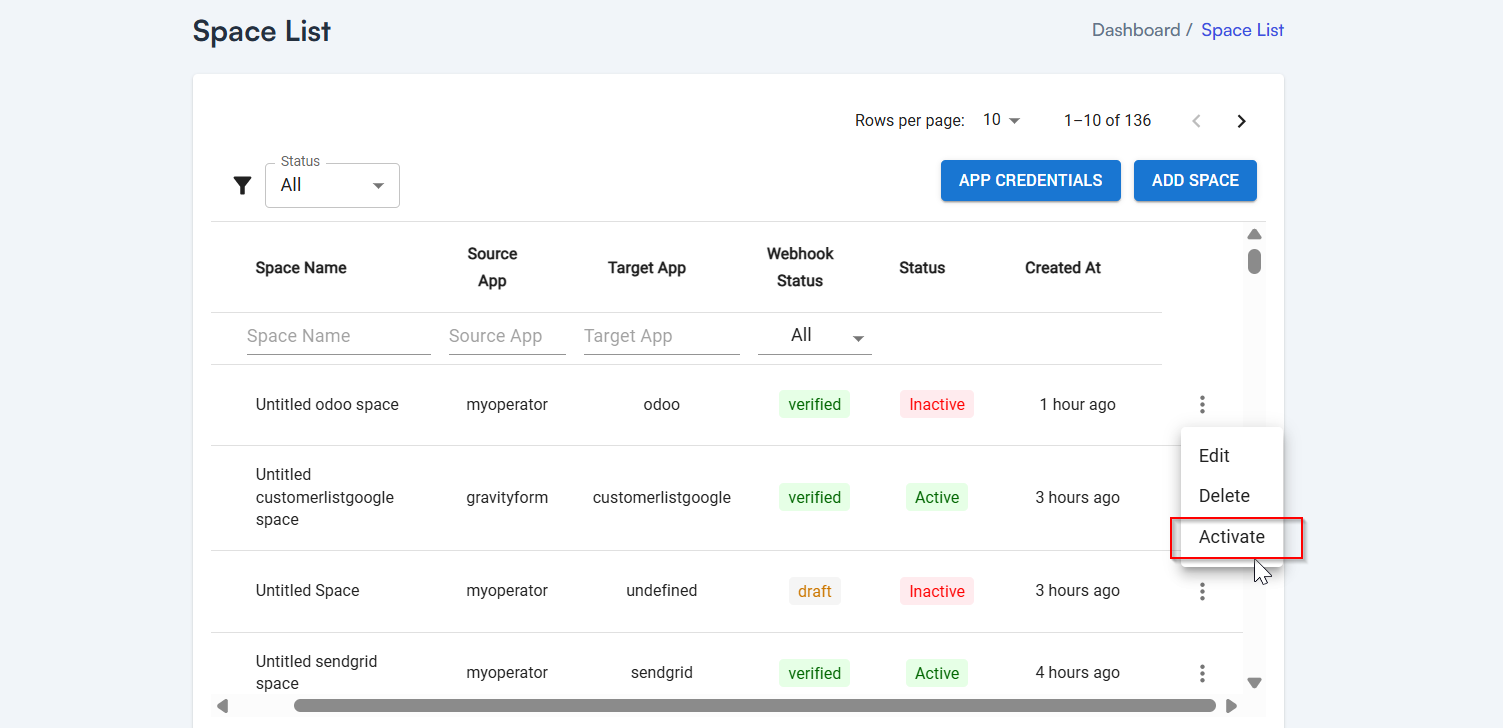
Step 22 From the Action Column, click to Activate Your Space
Step 23 Log in to your Odoo account and check the corresponding module
  • Go to crm > Leads and your lead will be visible there.
  • You should see a new record created based on the chat session
Gmail

New Attachment

Triggers when you receive a new attachment.

sheet

Only continue if...

Set up rules to specify when this Space can continue running.

Google Drive

Upload File

Triggers when any new file is added (inside of any folder).

Supported triggers and actions

Gmail

Triggers Attachment

Triggers when you receive a new attachment.

Gmail

New Label

Triggers when you add a new label.

Gmail

New Labeled Email

Triggers when you label an email.

Gmail

New Email

Triggers when a new email appears in the specified mailbox.

Gmail

Actions Attachment

Triggers when you receive a new attachment.

Gmail

New Label

Triggers when you add a new label.

Gmail

New Labeled Email

Triggers when you label an email.

Gmail

New Email

Triggers when a new email appears in the specified mailbox.

Gmail

New Attachment

Triggers when you receive a new attachment.

Gmail

New Label

Triggers when you add a new label.

Gmail

New Labeled Email

Triggers when you label an email.

Gmail

New Email

Triggers when a new email appears in the specified mailbox.